Monday, January 31, 2011

animals

tiger

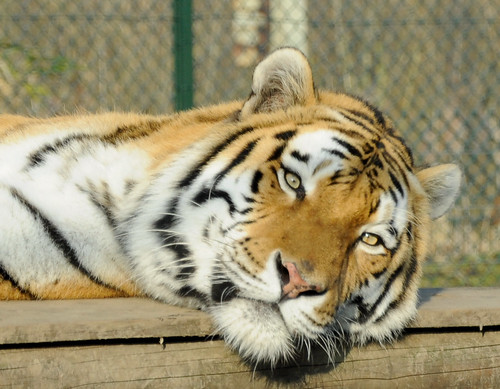
29/ Went to a zoo in the netherlands today, here some pictures..
This tiger seemed to be sleeping, but when my camera focused on him he opened his eyes.. this was the second picture I took by then he was really looking at me..
would he hear my camera or notice the light from the auto-focus with his eyes closed ?

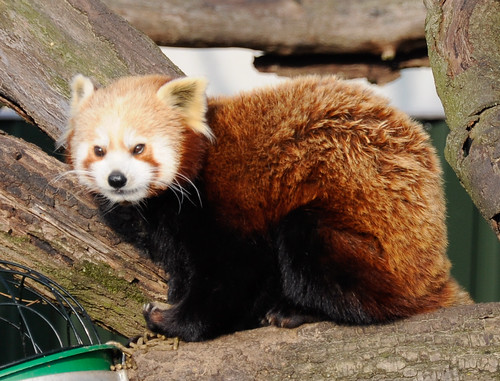
red panda

30/ red panda

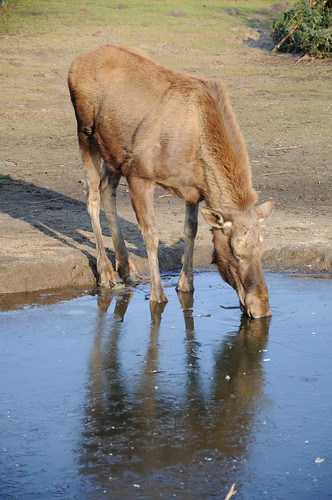
moose

31/ moose

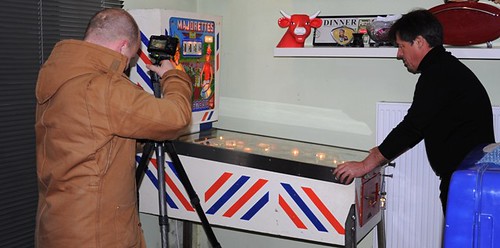
Pinball movie in our kitchen

guillaume vanderstichelen

28. Just a quick snapshot as photo picture of the day.
Was late home and we had visitors - making a movie in our kitchen as they needed an old electro-mechanical pinball machine. Teaching marketing around the world using a pinball machine as an example.

On the right is Guillaume Vanderstichelen, manager of ad agency DuvalGuillaume, on the left is photographer and blogger Pieter Baert.

Thursday, January 27, 2011

next photos - silver jewelry

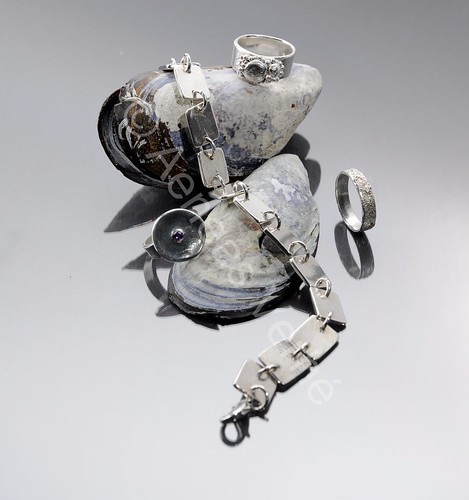
More pictures for this week - a neighbour makes jewelry in silverclay. She needed good photos for her new website, and I need objects to photograph and test lighting setups.
Been busy for a few evening with them, testing different setups.

_DSC7798

23/
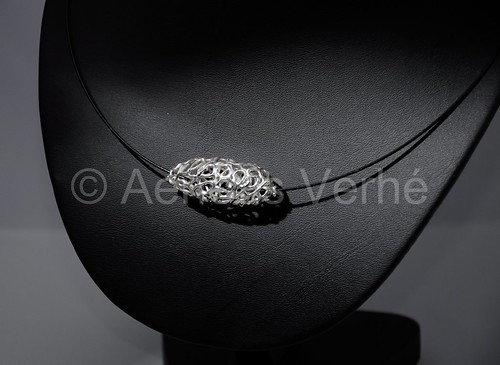
First evening I shot all pictures in a similar setup. Everything in my mini studio/lighttent, giving a nice clean white background. I had a white and black bust, so I shot every jewel on it. Closeup of the jewel and full picture of the bust with totally white background. Technically correct pictures, clean shots, but boring. Decided not to use any of the photos of the white bust as the silver jewels didn't stand out enough. On the black bust your eyes are more drawn to them.

This picture is a slightly different setup and much more interesting to see (maybe I should crop it a bit more at the left). Still in the mini-studio, but background is underexposed. The flash was held camera top left, half of the light hit the edge of the top of the lighttent, other half was directly onto the jewel, pulling attention to it, while the angle still brings out the texture of the background. Strobe was dialed down a lot, just to give a highlight on the bust, not to make the whole background white..


silver1

24
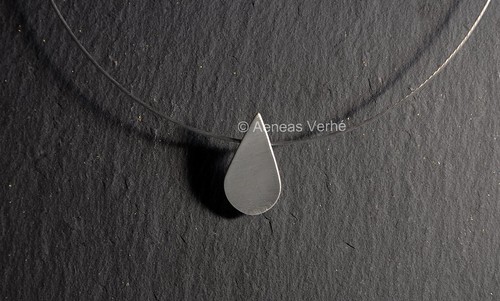
Different background. This silver hanger is very difficult to photograph - because it's flat and almost has no texture, any light that hits it from the front is reflected and created an overexposed highlight. Have some pictures of this silevr jewel on the black bust, and while it looked good, it was not totally what I wanted.

For this picture the strobe was held at the far right.
This brings out the texture in both the background and the brushed surface of the silver jewel. The highlight on the right edge brings out the tear shape.

_DSC7947

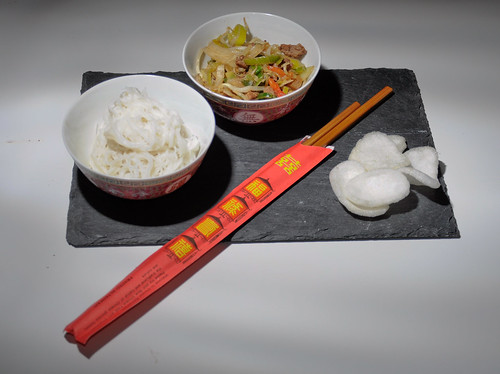
25 Nikky made dinner, took a picture for her blog and her recipe program she now stores everything in and it can also store pictures.
Just a quick shot, strobe held in my hand camera left, dialed down so it wouldn't overexpose the left bowl.

silver2

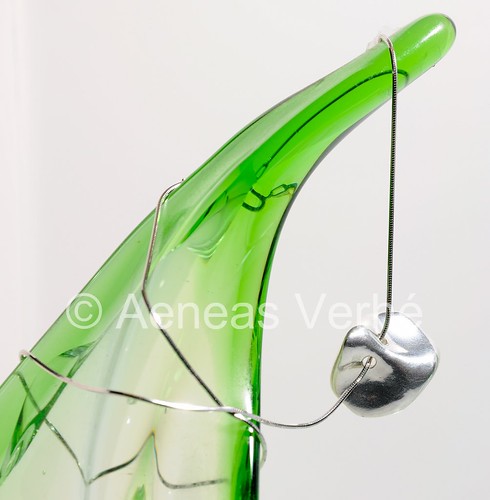
26 Silver juwel draped over a glass vase.
Nikky helped me set up things.. she has more inspiration than me in finding different setups, bringing color into the scene. White reflector boards all around this, black board on the bottom.
This jewel is difficult to shoot, because of it's shape it's acting like a mirror reflecting everything in the room in it. It took a bit of testing to see where to position white/black cardboard and strobe.. too much white and you could not make out its shape, too much black and it just didn't look nice. Maybe I should've taken lightgrey paper to give the silver more a silver look :-)

silver3

27
Jewels sitting on clear plexi with black paper underneath.
Flash with small softbox on it, aimed directly into the white background behind which is nicely reflected into the plexi.
I should've turned the bracelet so the lock is invisible in the back, front should be totally sharp too.. but other than that I'm happy with this picture.
One point of improvement - the circular ring on the left has a little purple stone in its center which you don't see well. A tight lightbeam of hard light (like from a laserpointer/led flashlight) directly in it could've made this stone shine more.

Saturday, January 22, 2011

some 365 photos

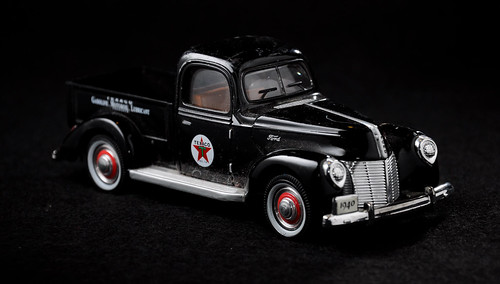
texaco car

photo 19: model car.. testing with a black car on black background, want to show just the highlights
bounce cards left and right, strobe in right back corner aimed at left white bouncecard
could use some more sharpness from front to back..

ferrari 250 testa rossa

photo 20: Ferrari 250 Testa Rossa model.
Wanted to get the lighting so that you only see the outline.. this is the best I got, not totally what I wanted. Have to research more how to do it and control the light more..

lit by strobe on the right, white bounce card held above car
don't like the headlight with all the light, next time I'll move the strobe to the backside of the car

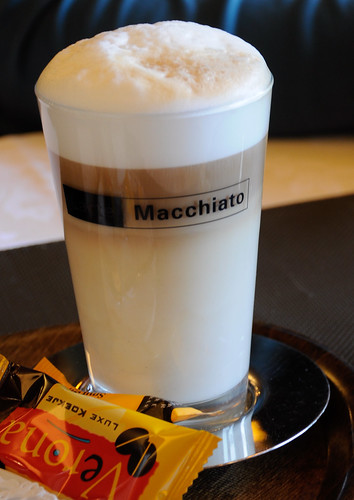
latte macchiato

photo 21: latte macchiato.. it was good :)

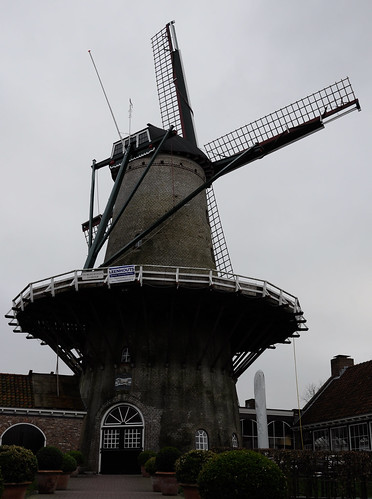
windmill

photo 22: we were in Sluis (The Netherlands) today..

Tuesday, January 18, 2011

Safecracker playfield supports

Hacked something together today.. support brackets for the playfield of my SafeCracker pinball machine.

On almost every machine of this type the playfield is bent - this is because there are some very heavy assemblies mounted to it (the drop target banks), and also because the supports on the sides do not run over the whole length, on each side they stop to make place for a rubber ring.

I had read about this in the past on RGP, someone has even made custom support brackets. But these are quite expensive ($150 or so) for just two pieces of metal..
so this afternoon I was thinking if I could make something myself.


Here you see the playfield is not perfect flat anymore. It's not too much, I've seen pictures of peoples machines that are warped much more.

Searched a bit in my basement and found unused aluminum pieces from an Ikea Kvartal curtain set.
About an hour of work to measure everything, drill holes, cut away pieces, and I've installed a piece of metal on both sides of the playfield.


It may not look like the most professional solution, but it should keep the playfield from warping more in the future..

btw one of these is is 365 photo 18 :)

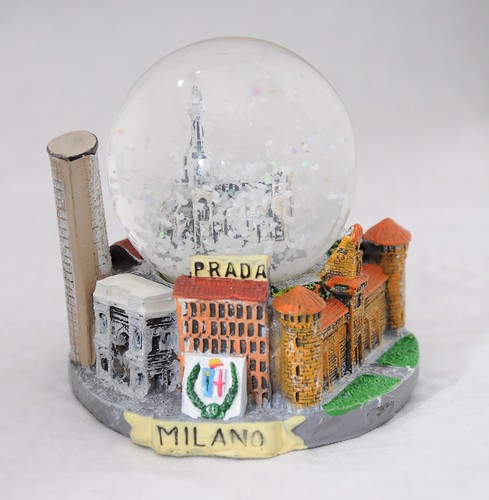
365 17 Milano

sneeuwbol

Object of the day, a snow-globe from Milano, Italy.

We've visited the city of Milan the past 2 years, each time when we went to the Italian Pinball Championship.
My daughter started to collect these globes, unfortunately the one she had from Milan broke :(

When a friend posted on facebook a while ago that he was going to Milan, I asked him to bring one for my daughter. So he did. Here it is !

Taking pictures of a reflecting glass ball isn't easy - put white reflector cards (those I assembled last week) all around it, just leaving enough space for the lens, strobe bounced on the white ceiling to provide overhead light.

Sunday, January 16, 2011

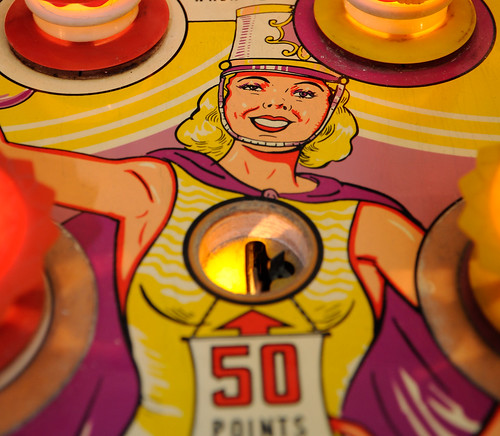
365 16 Gottlieb Majorettes

majorette

Made some pictures of my Gottlieb Majorettes pinball machine.

Will put a gamereview of this machine later online, so I needed good pictures showing every part of the playfield.

This smiling majorette is the main attraction as she's in the middle of the playfield.. she's worth 50 points and likes it :-)

Saturday, January 15, 2011

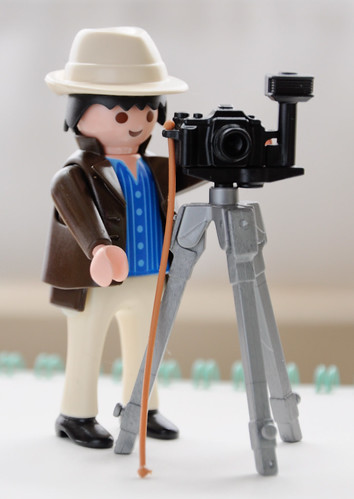
365 15 playmobil photographer

playmobil photographer

Went to a toy store today with my daughter. Saw this Playmobil photographer so I just had to buy it.

Picture taken in natural light. Before a window, backlit. White paper in front used as reflector for fill-in light.

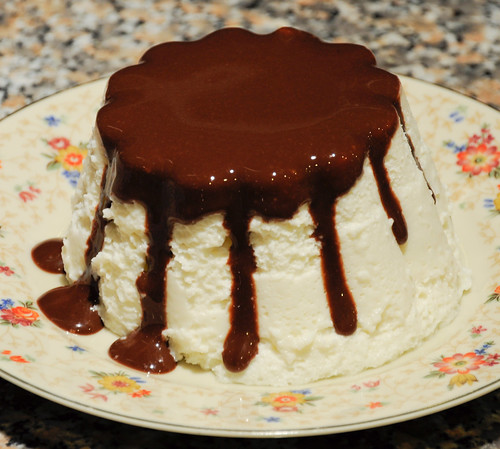
365 14 Mona dessert

mona

My wife brought this from a dutch supermarket friday.
Dessert by Mona.
They do special versions all the time, this one is like this cookie.
(have no idea how this is called in english)

These cookies are delicious.. but this dessert ? not really. The white is a bit too foamy for my taste..

Thursday, January 13, 2011

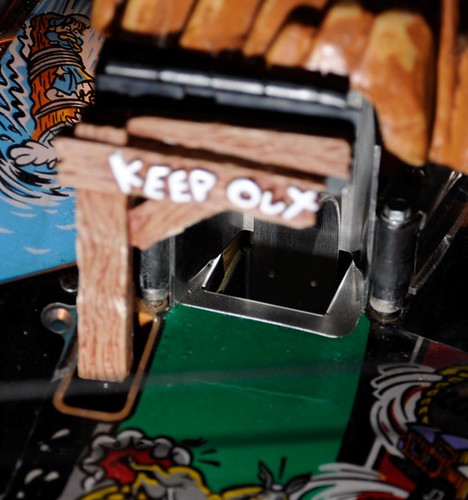
365 13 Cactus Canyon protector

Cactus Canyon pinball

Spent an hour installing a Cliffy protector (that's the bent metal that protects the edge of the wood from wearing) on my Cactus Canyon pinball machine.

I've also ordered 4 protectors for the bad guys drop targets, will install them someday..

Lit by bare strobe which was laying on the playfield.

Wednesday, January 12, 2011

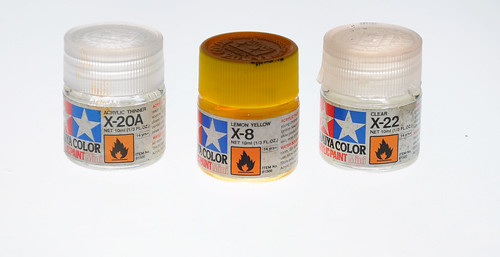
365 12 Tamiya paint

Tamiya

Picture for my site, in the article about playfield touchups on an Indiana Jones pinball machine.
I received a few inquiries the past months about what specific Tamiya paint it is, so here's a picture.

Didn't want to take a quick snapshot picture so I put some effort in it.
Paint bottles sit on frosted glass, lit from below.
Easy to do and it gives a cool effect..

Could've improved it by using a bounce card from above so the top of the yellow lid would be brighter.

interesting artist

I follow a dozen of blogs about photography (well maybe two dozen, haven't counted them). Some blogs are interesting to read (things to learn), but a lot of them just (re)post pretty pictures from different sources.

Usually I quickly scroll through the latter, it's a quick way to see what other people are doing, what's interesting, hot, ..
A lot of them are similar: fashion, landscapes, .. while technically most are very good, not often I come across that really is great and different from all the others.

But today I came across this post about the work of
Ben Heine and I really like it !
I actually took the time to look at each picture in detail.

It's an original idea (well at least as far as I know, probably someone else will be doing something similar as it's a very large world and the chance of 2 people having the same idea is quite big). I like it as it combines photography an drawing (I've done art school myself until I was 16, also like things like Escher). It has a bit of surrealism to it. The work has a great quality and is of a high level - the photos are technically good (sharpness, exposure, ..) and the drawings are also nicely done (ie it's not a series of bad snapshots with some drawings that everyone could produce).

It also shows you need to have an original idea and be consistant with it.

A 365 project won't make a photographer famous or published in a photography magazine (except in lists of 365 projects). A 365 project is good to learn a lot of different aspects about photography. But once you master the techniques, you have to stop copying others. You have to come up with your own style and technique. Your own portfolio. Your own idea. When people see your picture, they know it's made by you.

The last year I've seen a lot of different photographers published in magazines - I'm too lazy to look up the links, but I've read articles about photogs only taking only photos of flowers, of animal skeletons (with black background), of water drops (or ink drops), of fruit slices, of pinball machines, of drunk people on saturday nights in a city, of soap bubbles, of machines taken apart in layers, ..

As all these magazines need to be filled each month with new ideas, it won't surprise me if this work is picked up by some editors and showcased (so all amateurs can start copying it).

Tuesday, January 11, 2011

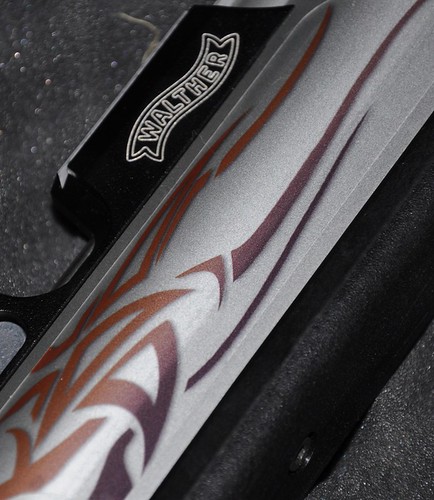
365 11 Walther

Walther LG30

Closeup of something made mainly out of aluminium and plastic..
Drove 4,5 hours today to get it..
first thing my wife does with it is stick some decals on :-)

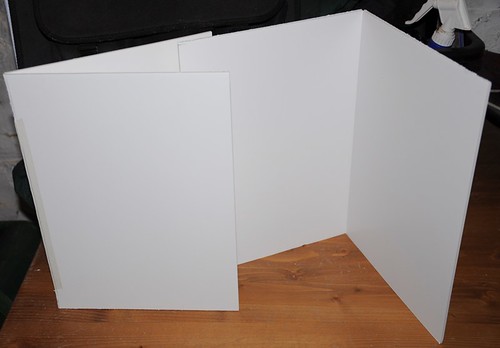
365 10 bounce cards

bounce cards

Made a pair of bounce cards.. white boards. They're made of something which in dutch is called maquettepapier, which roughly translates into 'model paper'. Not because fashion models like it but because it's supposedly used to make scale models..

Anyway it's sort of 2 thin plastic sheets with foam between them. Don't know how it's called in english.
They're nice white, a bit reflective, and sturdy enough to stand up and open/close as needed.

Why do I need them ? Well if you have one light source (ie a window or a strobe) you put these on the opposite side of the object you want to photograph and the light is reflected, aka giving you an instant fill-light.

Maybe I'll cover one side with black paper so I can use it to prevent reflections too.. will see when I use them.

Sunday, January 9, 2011

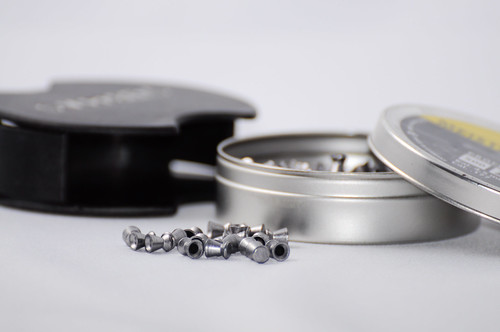
365 9 air rifle pellets

RWS Meisterkugln

Finally used the mini-studio I have for a year now.
It's a cube consisting of three translucent white sides, in which you can put a white or blue fabric.
Used two strobes to light it, one left and right, right a bit less to give some shadow.
Next time I'll get my tripod and try to use just one strobe from the top, probably that should work too.

Lighting is good for a small detailed shot with small dof like this.
Especially because the metal box is reflective, you can't have a hard lightsource.

On other shots where the whole object is sharp, the lighting is too flat for my taste.. I also made photos of a blue plastic box with pellets, it just doesn't look as good as this metal box.

Subject are air rifle pellets in the metal box they come in, with on the left a plastic clip that you can slide over so the box doesn't accidentaly opens..

Made different shots, I like this best with very low viewpoint and shallow dof.

Saturday, January 8, 2011

365 8 -nothing

picture removed..

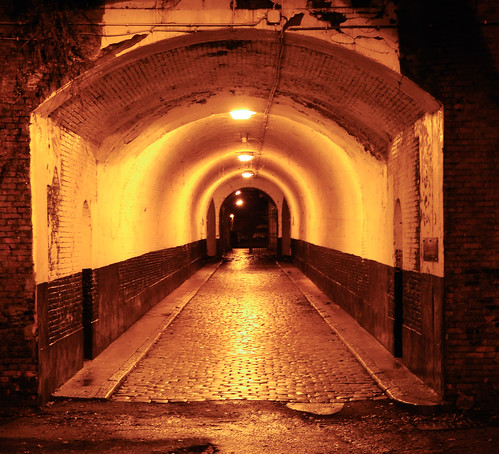
365 7 tunnel

dark tunnel

Apart from pinball machines, my other hobby/sport is target shooting.
The club I'm in has its location in a fortress that was started to be built in 1860.

Through this tunnel you enter the inside locations. Since a few years I always say to myself I should take a picture of it, so now I did.
Took the picture by hand, I should have taken a tripod.. maybe next time.
Should also play a bit with the whitebalance as this looks more orange than it is in reality.

Thursday, January 6, 2011

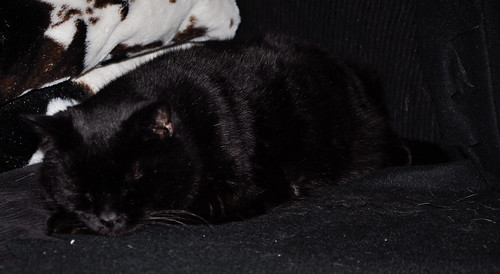
365 6 black cat

black cat

One of our two black cats. Asleep in the sofa.
They're sisters, the one I really wanted to take a picture off almost looks the same (she's just a very little bit skinnier but you won't notice it in the picture) but she was out in the garden when I had my camera in my hands.
She's not deep asleep, just had opened one eye to look at me.

Why is this the picture of the day ?
Because it's 6am and her sister already kept me awake for 2 hours.
Comes in our bedroom, goes around the bed, jumps on the bed at my wifes side, walks over our heads and lays next to me (and gets thrown off so settles for the nightstand where she's purring and keeping me awake). Repeat this a few times.
I love my cats (we have these for 12 years now) but I need my sleep.

Things to improve: Photo is just a snapshot using builtin flash. I should have taken my strobe and aimed it at the ceiling to have some nice soft overhead light which will bring out here shape better and show her better against the black sofa.
But the strobe is upstairs, it's 6am and I'm already awake for 2 hours - I can't be bothered.

Although it's just a snapshot - I did learn a valueable lesseon from it.
The first picture I took of her was too dark. Checked the settings and the camera was still set to underexpose a full stop ! It was still like that from shooting the solar eclipse.
This reminded me that the first pictures I took at the chinese restaurant had weird colors because the whitebalance was wrong. Luckily I noticed it after the first pictures I took.
My sister in law (who's a professional photographer) had lent me her Expodisk earlier that day, and in my kitchen I had tested with it. When I arrived at the restaurant in the evening the camera still had the custom whitebalance for my kitchen set :(
2 mistakes in 1 week because of wrong settings ?!
Now I learned to remember what I change in settings and re-set everything at the end of a photoshoot before I put the camera away, and to review these settings before I start taking pictures.. instead of just taking the camera and start shooting, thinking everything is still set like it usually is..

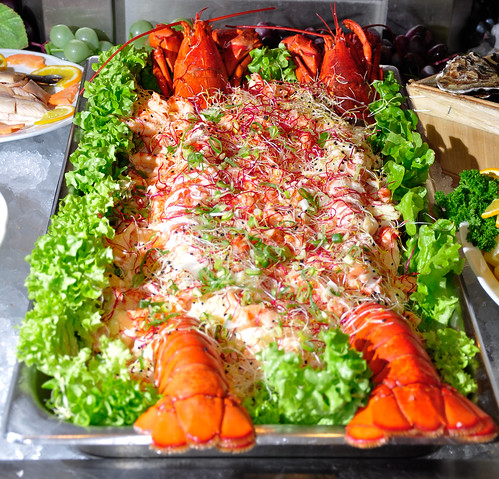
365 - 5 lobster buffet

lobster buffet

Last picture from the buffet, I promise :-)

Lobster dish.. shot with strobe offcamera left in combination with on-camera flash to provide fill light.
Needed the hard light from the left side to give everything some definition, especially the lettuce.
Food with red colors isn't easy to shoot and make look appetizing..
With flat overhead light this dish looks like it had been thrown up by someone. While this overview shot won't get me published in a food magazine, with the harder light and bright colors at least it looks more appetizing..

The dish wasn't meant for the people that were in the restaurant at the time I was taking pictures (was for the group that came later that evening), the chef brought it, put it on the counter and was standing next to it waiting to take it back into the kitchen, I had like 20 seconds to take pictures of it..

I thought about other compositions (closeup detail) but didn't quickly come up with something useful.. with the lobster head and tail separated an overview picture looked best for me to do with so little time. At least now you see: there was lobster on the menu! and that's the most important goal of this picture (when ie used on their website).
A 3/4 angle closeup picture may be better artsy food photography, but then you'd only see a fuzzy border of green lettuce and the white middle part, you probably wouldn't immediately know it was lobster.. and I really didn't want to make a closeup picture of a lobster head or tail as it's food photography and not biology.. people have to be hungry after seeing the pictures and want to come taste the food.

Now I think about it, with the green/white/red colors in it I could've made this look like an italian flag :)

Things to improve: composition: remove other dishes so this is by itself.
More dof - lobster tails in front are not totally sharp.

Wednesday, January 5, 2011

Indiana Jones redecal

Went yesterday evening to a friend to help him put new cabinet decals on his Indiana Jones pinball machine.

That machine was last summer at my house where we sanded and prepped the cabinet. Then he took it home, finally he had finished shopping the playfield.

I've only decaled one pinball machine before (also an IJ). We did the coin door part first, using the wet method. This means you put some soapy solution onto the wood first, so you can position the decal a bit when it's down. Then you really push it down and get all water out. It went well, it was correctly positioned, but the decal didn't stick as much as we liked. While cutting the edges you had to be careful not to lift up the decal and introduce bubbles.

We put the bottom cabinet aside with some heavy books on top of the decal and did the backbox next.

Both sides went on, this time dry. First we position the decal with protective backing still on. Make sure it overlaps everywhere. Then using masking tape I tape down one edge (top side as it is a bit wider than the bottom side). That way it cannot move. First practice, with backing still on, roll it over the cabinet to see we end up perfect like it has to be.
Pull back the protective backing and start rolling it in place. Eric kept the other end up in the air and pulled away the backing, while I pushed the decal in place and made sure we got no air bubbles. It all went very smooth.

Having done the backbox like this, we decided to also do the cabinet sides also dry.
Now the front decal stuck well btw, having dried out a bit and with the books on it.

The long cabinet sides are the most difficult to apply. You really have to make sure you are very straight as if you start a bit at a wrong angle, at the end you'll be off a large part (as the cabinet decals are so long) !
Again positioned the decals correctly, so the lines matched the lines from the front decal.. IJ cabinet decals from pinball.com don't line up perfectly btw, and to have them line up pretty close you'll see a white edge at the top.. but don't worry about that as the siderails goes over it so you won't see it anyway. But there's only one or two mm that you can move the decal around, it's a tight fit over the cabinet side. There's no room for mistakes !

Put on masking tape to make sure the decal stayed in position at the front. Then then usual process, Eric kept it up in the air, peeling the backing away and I pushed it onto the cabinet.
This also went very smooth.. in the end the whole process took us less than 2 hours.
(I think decaling itself was 1,5 hour, the rest of the time was putting the game in his living room, making preparations, ..)

Didn't take pictures, will try to remember when I go there next week to put the playfield back in.. a freshly decaled cabinet looks very nice !

btw: we worked with the cabinet put onto a thick blanket, we both wore wool sweaters, we worked over the decals, this resulted in static electricity !
We both were charged a lot, each time we touched something it resulted in a zap, folding up the blanket zapped us, .. good thing we didn't have to handle sensitive electronics and didn't touch the pcbs in the backbox.

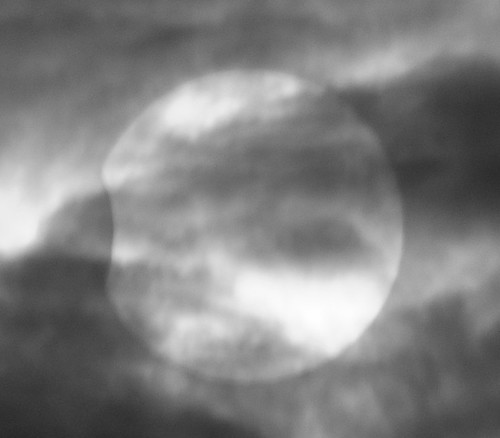
365 solar eclipse

solar eclipse

Tuesday january 4 there was a solar eclipse. It was total in parts of North Africa and Russia, only partly in West Europe.

It would start as from sunrise (around 9.15am), be at its maximum around 10 and be over at 10.45.
I woke up and.. the sky was totally cloudy :-( Aaaaargh.
Not individual clouds, but a complete layer of clouds leaving no space in between. And I couldn't feel a lot of wind, so they were not going to go anywhere.

Went out a few times in the garden but could not see the sun at all.. sometimes there was a bit of a highlight showing behind some clouds but you couldn't see the outline of the sun itself.

I was in the house, playing games with Maya, when suddenly I saw sunlight at the border of the kitchen window. Sunlight - so the sun is shining through the clouds !
It was almost 10.30 so at the very end of the eclipse.

Ran outside with my camera, yelled at Maya to come too - who was for once a good girl and ran into the hallway to put on her jacket - while normally she never puts on a jacket to go in the garden..
Quickly shot some pictures, and when Maya arrived I lifted her onto my shoulders and gave the goggles to her so she could see the eclipse too. She was just in time and watched the a few minutes. Then clouds became too thick again and the sun disappeared.

Technical info - photo taken with my 70-300mm lens at 300mm.
As I wasn't sure about how bright the sun should be as it can damage a camera (and one shouldn't look directly into the sun either), I had put two ultra-violet filters on my lens (took one from my other lens which has the same size). In this photo I also held welding goggles by hand before the lens. I don't have an ND filter (neutral density filter) which is something you would use for this type of photo - but the welding goggles served the same purpose.

Also took some pictures without the welding goggles but they're not as good - I did manually adjust exposure for the bright sunlight, but the clouds are also overexposed so you don't see the edges of the sun as well as on this picture.
Maybe a polarising filter would have helped too (which I don't have in the size for this lens).

So I'm not unhappy - despite the clouds I was able to shoot a few pictures of the solar eclipse.. not as impressive as others have (at its peak 77% was covered here in Belgium), but luckily enough the sun did come out for a few minutes from behind the clouds so we could see something..

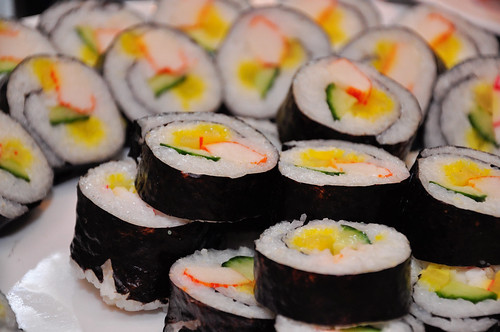
365 sushi rolls

sushi rolls

Picture for january 3.

Sushi rolls from my restaurant photoshoot.
Same concept as my jan 1 post - tried some different viewpoints, flash setups, ..

This looks best with the shallow dof and only part of the plate visible (it was a large round plate completely filled with sushi).
TTL flash was used, strobe in my left hand, aimed at the back into a mirror to give an overhead fill light. Other shots aimed at the sushi directly gave too much shadow/highlights.

Things to improve: the badly cut sushi at the left of the center tower.. I should have seen this and turned to plate so only 'good looking' sushis are showing.

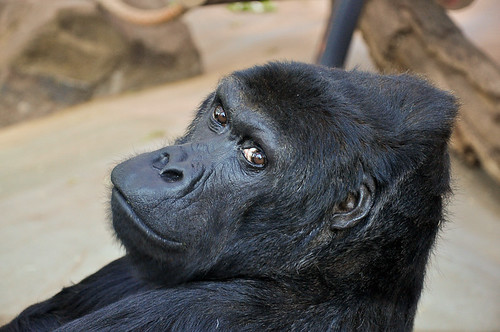
365 jan 2 - gorilla

gorilla

Picture of january 2nd..

Been to the zoo today with my family. Didn't take many pictures, the weather wasn't very good, we didn't stay that long at the zoo. This is the best picture I took.

The gorilla sat near the glass and was eating some lettuce. When she finished (I think it's a she), she sat and looked straight ahead. Suddenly her head turned a bit and she looked at me.

When taking pictures of animals (and people) the eyes are important. That's a rule - the eyes have to be sharp.

Points for improvement:
- I should crop the top a bit, so the green lettuce in the back isn't showing, leaving a whole sand colored background)
- the dark stick behind her head in the background, picture would be better if that was not there

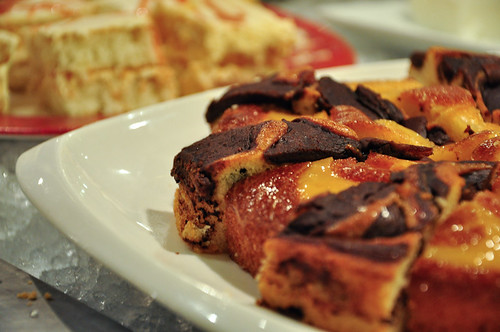
365 jan 1 - cake

cake

Picture I made on dec 31, at the chinese restaurant where my wife works.
She asked me to go their as they need new pictures for the website and the buffet for the New Years celebrations were impressive.

Took a lot of pictures, but had to work quickly as people were arriving (and were starting to eat, taking away food from the buffet I wanted to take pictures from).

Had my strobe with me, quickly tried different combinations.. had an idea about what I wanted to achieve but took different types of pictures, to see later what was good and what not.

(ie took this picture from different viewpoints, with and without flash, flash aimed at different angles, ..).

This one was the best. Food photography isn't easy (but I love it ! - and I have the feeling I will be doing it much more as my wife recently started a dutch blog about food).
The food needs to look tasty - usually this means lots of light, food has to be bright and show highlighs. Usually it's best to have light coming from behind.
Shoot it the internal flash of your camera (or above camera) and it all looks flat and disgusting. Some shadows and highlights are needed.
You also need to show texture, so your position and the light is very important.
Usually you want to have a small dof (depth of field) to concentrate attention on a specific piece.
Of the whole series I took of this plate, this picture looked best in my opinion..

Points for improvement:
- crumbs at bottom left are something I should have noticed and removed, they have no place in professional food photography

Project 365 photography

Happy new year everyone !

I've decided to start a 'photography project 365'..
This type of project means someone takes (and posts) a picture every day, for a year long. 365 pictures. Using a camera often should make a person a better photographer (or show the world how bad someone really is..)

A friend of mine, John Wart Jr had posted last week on facebook that he'd start such a project. It reminded me about photography, and that I should also start practising more.

About 2 to 3 years ago I had a similar idea. I even started to take a small camera with me to take snapshots - sometimes you encounter things of which someone says 'wish I could take a picture of this'. But after about 2 weeks I stopped with it, as most of them were just bad snapshots and I didn't encounter much interesting opportunities. It did inspire me to open my eyes, and actively look at the world around me, search for photo opportunities, appreciate the beauty everywhere around, ..

2010 is over, and reflecting back on the past year I noticed that I had again too many things planned to do and just didn't do them in the end. Since last summer (until next summer) I work only 4 days a week. That extra day at home was meant to work in the house, get things fixed, do things I want to do (like repairing pinball machines), so evenings and weekends are free for my family.

Partly I succeeded in these objectives. The whole summer I spent every tuesday with my daughter. I (almost ?) didn't do any jobs then - daddy at home during the holidays was for spending time with her. When school started for her, these days off were used to do a lot in and around the house.. everything that needed to be done was always planned to do on that one day, so the rest of the week I don't have a list of things to do during the evening or weekends. We also remodeled the living room, which took more than a month, at some point it seemed the list of things to do never reached an end.
But now it finally has. Although new tasks always pop up, the majority of them is done.

As from next week I plan to find more time to do things I want to get done for myself. Repair pinball machines :) I still have a Williams Cyclone to shop, a Funhouse and Black Hole to repair, .. I have an ultrasonic cleaner I want to use, I have sandpaper and metal polishing stuff I need to test. And about a dozen of other ideas I want to do some time..

But back to photography. Last year I got me a new camera, a D90 with a lot of lenses (Sigma 10-20mm, Nikon 18-105 and 70-300). This summer I also bought a Metz strobe.
Most pictures I take during holidays, or when we go out on a trip with the family.

My wife gave me a small white lighttent/mini studio set as a gift for Christmis last year, and I haven't used it yet :( Despite studio photography (esp. of objects, where you control all light sources) interests me a lot. On my todo list there's still 'take pictures of Cactus Canyon and Majorettes pinball machines'. I play these games often but haven't taken nice photographs of them yet. I should take good photos of all my other pinball machines as well and update all their descriptions on my site.

Reflecting on all this, a project 365 sounded like a good opportunity to do more with photography. But as there are days I hardly have time to even check email in the evening, I'm sure taking a picture every day is something I won't succeed in. Therefor I give it my own twist - I'll make and post 365 pictures in 2011. Every picture is maximum 1 week old. This means one day I could take 7 pictures and use them for the next days, or when I run behind (as I'm not sure tonight I'll have time i.e.) I have max 7 days to catch up. That's a goal I should be to keep for this year.

It should make me a better photographer. At least force me to use my camera more. And also try to get a 'good' picture. Not just a series of snapshots, but make sure I have at least one that's worth of showing to the world. I will also start to review my photos better (now I dump too many on my harddrive and leave them there), searching which are the best and critisizing myself to see how I could have improved them). It should allow me to put everything in practice of which I read the theory of.

You don't want to know how many books and magazines about photography I've read the past 3 years. That's how I am - I like to read, gather knowledge. Photography mags bore me nowadays - their tutorials are nothing new to me - I understand how I have to shoot each subject, how to set the camera and light, .. I can explain it. It all makes sense to me.
But I just haven't done most of it (maybe because I understand how it's done it's no challenge anymore, it all seems obvious). So it's time to tackle some projects, find some challenges for myself, keep me motivated, interested and produce some great results.

Now for those people that come onto this blog post from my pinball website, sorry, this year you're going to read a lot about photography here and see non-pinball related photos. I don't want to start another separate blog. As my hobbys are mixed I'll probably post a lot of pinball machine pictures here too.. (I got interested into photography after all when I wanted to learn to make better pictures to use on my website).
These picture posts do have '365' in their title and only have 'photography' as label, so they can be easily identified from other pinball-related posts.
Hope you'll enjoy them..