Went yesterday evening to a friend to help him put new cabinet decals on his Indiana Jones pinball machine.
That machine was last summer at my house where we sanded and prepped the cabinet. Then he took it home, finally he had finished shopping the playfield.
I've only decaled one pinball machine before (also an IJ). We did the coin door part first, using the wet method. This means you put some soapy solution onto the wood first, so you can position the decal a bit when it's down. Then you really push it down and get all water out. It went well, it was correctly positioned, but the decal didn't stick as much as we liked. While cutting the edges you had to be careful not to lift up the decal and introduce bubbles.
We put the bottom cabinet aside with some heavy books on top of the decal and did the backbox next.
Both sides went on, this time dry. First we position the decal with protective backing still on. Make sure it overlaps everywhere. Then using masking tape I tape down one edge (top side as it is a bit wider than the bottom side). That way it cannot move. First practice, with backing still on, roll it over the cabinet to see we end up perfect like it has to be.
Pull back the protective backing and start rolling it in place. Eric kept the other end up in the air and pulled away the backing, while I pushed the decal in place and made sure we got no air bubbles. It all went very smooth.
Having done the backbox like this, we decided to also do the cabinet sides also dry.
Now the front decal stuck well btw, having dried out a bit and with the books on it.
The long cabinet sides are the most difficult to apply. You really have to make sure you are very straight as if you start a bit at a wrong angle, at the end you'll be off a large part (as the cabinet decals are so long) !
Again positioned the decals correctly, so the lines matched the lines from the front decal.. IJ cabinet decals from pinball.com don't line up perfectly btw, and to have them line up pretty close you'll see a white edge at the top.. but don't worry about that as the siderails goes over it so you won't see it anyway. But there's only one or two mm that you can move the decal around, it's a tight fit over the cabinet side. There's no room for mistakes !
Put on masking tape to make sure the decal stayed in position at the front. Then then usual process, Eric kept it up in the air, peeling the backing away and I pushed it onto the cabinet.
This also went very smooth.. in the end the whole process took us less than 2 hours.
(I think decaling itself was 1,5 hour, the rest of the time was putting the game in his living room, making preparations, ..)
Didn't take pictures, will try to remember when I go there next week to put the playfield back in.. a freshly decaled cabinet looks very nice !
btw: we worked with the cabinet put onto a thick blanket, we both wore wool sweaters, we worked over the decals, this resulted in static electricity !
We both were charged a lot, each time we touched something it resulted in a zap, folding up the blanket zapped us, .. good thing we didn't have to handle sensitive electronics and didn't touch the pcbs in the backbox.
Showing posts with label shop. Show all posts
Showing posts with label shop. Show all posts
Wednesday, January 5, 2011
Thursday, October 7, 2010
I have an ultrasonic cleaner
When we visited Henk de Jager to drop off our Gottlieb Majorettes pinball machine (see post here a few weeks ago), we talked about cleaning and restoring pniball machines and exchanged some tips.
I had cleaned the playfield and tumbled all metal playfield posts and screws so they were clean and shiny. Henk and Ramon showed me a similar Gottlieb woodrail they were restoring (which is going to be for sale at the next Rosmalen jukebox show btw).
They had also cleaned the playfield posts on their game but did not use a tumbler.
Instead they showed me their ultrasonic cleaner and explained me a bit more about how it worked. I've heard about these machines before (I know some collectors who already use them for a few years) but never had a detailed look at how they worked and how the results were.
Well I was convinced by the results !
They bought theirs at Conrad, where they have a few different models for sale.
Nikky must have seen me look too interested at their ultrasonic cleaner, so imagine my surprise when a few days ago the postman brought me a large box !
She had done some research and bought me this ultrasonic cleaner.
An early present for our wedding anniversary that's coming up in a few days !
Thank you honey !!
Haven't been able to test the machine a lot, but once I have some more results I'll make an article about it..
Thursday, August 19, 2010
Back from holiday
Back from holiday, time to start working on pins again.
Removed all top parts from the Gottlieb Majorettes, will clean the playfield. Then it'll go to Henk De Jager for technical repairs, he'll put the game back in original condition (remove all the 'extra' wiring) and get it working again :)
Can't wait to play that machine !
Took most parts off the playfield (still need to desolder and remove the bumpers), gave the playfield a fast cleaning (to remove all dirt on the surface) and still need to use a polish to make the playfield shine and really clean.
Our pinball fridge is for sale.. we need to make space in the gameroom. So if you are in Belgium or the Netherlands and need a cool retro fridge for your pinball gameroom, let me know..
And I finally have to clean up the gameroom as now it's totally a mess.. a lot of toys where my daughter plays with in the garden are in there, there's an empty cabinet (and all the hardware of it) from an IJ of a friend that he'll redecal at my place, and much more..
Friday, July 16, 2010
Gottlieb Majorettes restoration
We bought a gottlieb Majorettes pinball machine recently. It's a wedgehead, one-player electro-mechanical pinball machine made in 1964. Pretty rare, very beautiful and fun to play. We're very happy with it as we wanted an old game like this for a long time.
It's condition is something we're not so happy with, it doesn't work and it's been hacked, a lot of wiring and relays have been added. Currently I have no idea what most of these do..
Made a page with pictures of my Gottlieb Majorettes pinball restoration.
I'll update it and make new pages when I continue working on this pinball machine.
Saturday, June 19, 2010
new flipper rubbers and pinball rings in stock
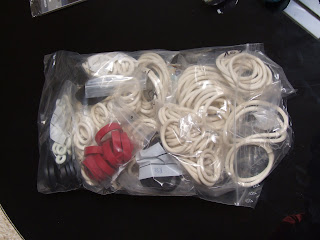
Got a lot of new pinball rubbers in earlier this week.. almost didn't have any rings anymore in some sizes. Had them at a good price too :-) Let me know if you need a new rubber set for your pinball machine..

Thursday, February 18, 2010
pinball cut in half
Added a picture to http://www.flippers.be/basics/101-pinballs.html
of a pinball cut in the middle. Cool to see the inside, I always thought they were of the same consistency, looks like they are two different grades of steel around eachother ?
of a pinball cut in the middle. Cool to see the inside, I always thought they were of the same consistency, looks like they are two different grades of steel around eachother ?
Wednesday, July 1, 2009
Flooded Fire
We bought another game this week.. this time it's a special project.
It's a Williams Fire. Problem with it is that it's been in a flooded basement.
The water came just up to the bottom of the backbox.
The playfield is covered with mud, some assemblies are rusted, ..
It doesn't look very good, but the electronics are still fine, so probably this game will still power up without any problem.. The playfield itself is totally covered with mylar so the paint and artwork doesn't look to have had any water damage. Most damage is to the assemblies at the bottom of the playfield which need a very thorough cleaning. But as some people take coils and wire looms into a shower to clean them, these parts can be cleaned without any bad long-term effects.
We're not sure yet if we'll clean and restore the game or just part it out..
it'll be a lot of work..
Pictures are posted on facebook, search for the page of www.flippers.be
You really have to see the pictures to get an idea how bad it looks..
Thursday, January 15, 2009
MM shop and rivets
Happy new year everyone.. been a while I've posted here.
Worked a bit further on my Black Hole, main playfield is now also completely clean and waxed. Almost time to search all the parts and start assembling it together.
But that has to wait (again) as for the moment I'm assembling a Medieval Madness machine. A friend bought one, but didn't have room at his place yet and had no experience at all at shopping a pinball machine.
So to help him out we brought the game into my gameroom and he came in the evenings to disassemble and clean the playfield. I gave some information on how to do it, what to watch for, .. while I worked on my own games (finally installed a Cliffy protector in my AFM !)
So the playfield was empty, cleaned, and this friend didn't have time anymore to work on it as he'll be moving into his appartment next week so the game has to be ready by monday.. sigh.. so it's up to me to assemble the playfield back together.
Not a funny job as temperatures in my unheated gameroom are only just above freezing..
It went quite well I have to say.. it did take me about an hour to first search all the parts together and have an idea where he put everything and in what order the last parts were removed :) Tip: if you shop a MM, measure the large black hexagon posts you remove.. seems there are a lot that are very similar in length but not exactly the same.. dno't just put them all together without noting which one went where..
Took me another half hour just to replace the bridge (you don't want to see the welding job done on the bridge that was installed in the machine).
Now I'm over halfway in assembling everything.
This Medieval Madness also gets a new plastic set. First time I had to remove rivets and put new ones in (was necessary to switch a flasher socket onto a new plastic).
Went quite smooth, was less difficult than I had thought.
Monday, July 14, 2008
Black Hole
Haven't posted a lot the last weeks.
We've been busy redecorating the gameroom.
The walls and ceiling got a new color, even some flashy 70ies wavy wallpaper.
This weekend I finally started on my Black Hole.
About 1,5 year ago I had taken all parts off the playfield, but then put everything in a box.. Other games also had small problems so I worked first on those, and just didn't want to start on the Black Hole.. because this is a large project.
Even shopping the pin, cleaning all parts, assembling everything back together is not something you do very quickly. It takes a lot of time..
I always waited to start this until I would have a few days off so I could work on it without many interruptions, but this just doesn't happen.
So I'll work now every evening a bit on it.. After 3 hours of work the small playfield is about 80% assembled again.
Still need to put on some plastics, new lightbulbs, and check the bottom side.
Then I can reassemble all parts on the main playfield.

Biggest issue then will be the electronics.. but I now have spare boards out of a Gottlieb Spring Break pinball machine I parted out so I should be covered..
(does anyone need plastics or playfield parts from a Spring Break ?)
Wednesday, September 12, 2007
polish and wax your car
Not a new article but as this is quite popular and interesting it's worth mentioning the existance of it.
Here you can read about car waxes and polishes, and which ones you can use on your playfields.
There are a lot of different opinions, most people swear by Carnauba wax, others use plain Turtle wax, but synthetic waxes also have their use.
There's no scientific research done (as far as I know) to waxing playfields, but there is a lot of research done to waxing cars, and how to polish them, remove small scratches and haze, ..


Subscribe to:
Posts (Atom)

