Another thing I learned yesterdat evening (or should've known as it isn't the first time something similar happens to me..)
Always check the replacement parts are absolutely correct before installing them.
I'm restoring a Bally Future Spa. This pinball machine has a row of 4 droptargets behind each other. The first one was broken. So yesterday evening I decided to replace it. Had a droptarget bank from a Stern machine that was parted out.. the parts seemed similar/identical enough. Paid a lot of attention to the bottom part of the droptarget, to make sure the shape where it mounts and where the screw goes through was correct.
Replacing droptarget isn't a task you do in a few minutes.. you have to disassemble half of the metal frame where they mount into. First removed a target to use as replacement part. Made sure I didn't lose the spring or C-clips involved.
Then I disassembled the droptarget bank on the Future Spa. Removed the broken part.
Put in the new part. The drop target was identical at the bottom, but the way the metal rod that holds it and pushes its up again is connected was different, as here the droptargets are behind eachother, and on the original part they were next to each other.
All goes well, about half an hour later I'm ready and want to screw it into the playfield again...
and then I notice it doesn't fit ?!
The new droptarget I used is a bit wider at the top and doesn't fit through the hole in the playfield ! :-(
So there's half an hour of my life wasted.. next task is to do it all over using a droptarget that is a bit smaller..
Friday, December 23, 2011
Wednesday, November 23, 2011
Grand Champion on Theatre of Magic
Visited someone yesterday evening to pick up some parts.. played a few games on his pinball machines, talked a bit, .. I haven't played Theatre in a long time and I don't consider myself to be a very good player (just average), so I was amazed myself by how well I played.
I like Theatre of Magic a lot - I love all John Popaduik games. This machine was playing very well, you could loop the centre ramp over and over, the flow in this game was unbelieveable. And that's the type of game I like - no stress, no worrying about the rules and what shot to make next - just letting the pinball roll around the playfield over and over, letting the shots come naturally. In the end I noticed I got quite far, the clock was at 10.. so then I only started to concentrate on adding a few hours.
I think it was only the third time ever that I've reached the wizard mode on Theatre (Grand Finale), and even got it whilst Tiger Multiball was running (have no idea of the game was a bit confused because of this).
Anyway, final score on 5 balls (and got 2 extra which I lost very soon) was over 3.5 bill..

Tuesday, November 15, 2011
custom bingo machine
New article, at the rock around the jukebox show Henk de Jager presented his latest game, an electro-mechanical bingo machine !
Thursday, November 10, 2011
AC/DC as the new Stern
Many rumors going around that AC/DC would be Sterns next title by Steve Ritchie ?
(after it was first rumored to be, then declined, ..)
In a new video from Stern about the making of transformers, Steve's pc screen is shown with a detailed autocad playfield drawing on it. A new layout, not of Transformers or any other released Stern pinball machine, so probably the next one he's working on..
On RGP and other forum people think the horns are about AC/DC.
Here's a screenshot , up to you to decide what theme it'll be..
Thursday, November 3, 2011
Medieval Madness broken switch
Why do switches always break at the worst possible time ?
Was playing Medieval Madness yesterday, had a very good game, 4 blue lights were already on..
and then suddenly the microswitch inside the castle didn't register anymore :-(
The gate was open but a ball shot trough it didn't register anymore. It's the same switch that registers a pinball that's being locked, so I also couldn't start multiball anymore (and only needed 1 shot).
No use continuing my game as I couldn't get any big points anymore..
Turned the machine off, removed the glass, lifted the playfield.. one wire had broken off.
1 minute of work to solder it back was all it took to make this pinball machine play well again.
Monday, October 24, 2011
Black Hole repair part 5
Finally worked a bit further on the Black Hole..
Last time I worked on it was about a month ago, the cpu didn't boot anymore after replacing a lot of corroded parts.
I can solder pretty good (not perfect), was sure I had put all the correct parts in the correct places, so thought it probably were 2 components shorting against each others..
Turns out my idea was correct. Investigated the cpu, measured continuity between every two solder points that were close together, and compared with a spare cpu board I have laying around.
Found two solder points that made continuity, that didn't on the other board. Visibly there wasn't anything wrong so it must have been a very thin trace.. Scratched between the solder points with the tip of the probe of the dmm and continuity was gone. Inspected the rest of the board, didn't find any other problems.
Put the cpu back in the game.. always an exciting moment.. and yes, after about 5 seconds the score displays illuminated !
At least one problem solved, we're making progress again.
The game still doesn't work completely. Popbumpers don't work. At least the fuses don't immeadiately blow anymore, they just don't work at all. Will trace the +5v again on the boards..
Flippers also don't work :-( I'll have to check the Q-replay underneath the playfield.
Some coils do work, like the outhole and drop target reset coils.
For some reason I have problems with this Q-relay. One set of contact points on the game just burns ?!! as if there's too much voltage going over it ?? Last month when troubleshooting it I had already replaced the blade contacts with those from the Q-relay of a game I parted.. they were good..
Now the cpu is fixed, I had started a game, heard a fuzzing noise from the back of the machine.. inspected the Q relay and one set of contactpoints is again a bit burnt ?? :-(
Thursday, October 20, 2011
Badly soldered BR3 caused weak coils
Repaired a WPC pinball machine this week. Fuse F112 on the powerdriver board always blew, because BR3 had shorted.
Replaced BR3 with a new bridge rectifier. Worked quickly in less than ideal conditions (dark environment, above the playfield, ..).
Put the powerdriverboard back into the game, played a game to test everything.
I noticed some coils were weak: the automatic ball launch could barely get the ball onto the playfield, an upkicker also could barely kick the ball high enough so it got onto a ramp, sometimes it fell back down into the kicker..
Weird ?!
What really was strange was that the behavior wasn't consistent. The ball wouldn't get launched onto the playfield (just couldn't make the ramp) and rolled back in the shooter lane.. and a second kick of the coil would kick it hard enough and then it would end up nicely at the back of the playfield. The upkicker would try one or two times and then the pinball did make it correct.
Time to check everything I changed and parts involved.
The bridge rectifier was the correct type. Checked the new fuse I had put into to make sure this was also a good type. Checked all connectors. Measured voltage at the coils, which was also high enough. (I first thought it would be too low.)
And still the coils were weak ??
Double checked the bridge rectifier I had replaced. When I had soldered it in, it was almost touching the heatsink of the transistor that's below BR3. I had pushed BR3 a bit above so there was some more distance between the parts. Pushed BR3 again, and one leg came loose ? Oops.. Seems it wasn't soldered well enough - one of the metal legs of the bridge rectifier didn't completely go through the board but ended about level with it. Either the connection was too thin for a lot of current to pass, or maybe there was some vibration that caused it.. anyway I resoldered the leg, added a bit more solder to all legs to be sure, and the problem was solved ?!
Monday, October 17, 2011
Pinball museum visit
Had a busy pinball weekend - saturday we went on a trip to a pinball museum in Neuwied, Germany.
It was open from 2pm till 6pm.. we had left early enough to be there at opening time but because of a huge traffic jam we only had less than 2 hours there. :-(
Couldn't play as many games as I wanted, so we plan to return again in a few months :-)
Nikky loved Rapid Fire - Peter set a highscore on AFM and was happy to play another Robocop, Michel found the moaning sounds on Hardbody obscene, and I took a lot of pictures :-)
This weekend was also the Rosmalen Rock around the Jukebox show. Usually we go early on saturday morning, but with the pinball museum visit on that day, I visited it only sunday afternoon.
It was interesting, in my opinion there were a little bit more pinball machines and parts for sale.
Met a lot of people. Henk de Jager presented an electro-mechanical bingo machine he totally created himself. He also had his latest book for sale, unfortunately only in dutch at the moment, about how to read schematics from electro-mechanical pinball machines.
Anyway, enough things to write a few new articles so keep your eyes on the site in the next weeks..
Update:
Article about our visit to the pinball musem.
Article about the Rosmalen jukebox show.
Friday, October 7, 2011
Fixed a CSS bug - text-decoration does not cascade.
A new visitor of my site emailed me with some comments, which I appreciate.
I always try to improve my site, but it became too large (over 350 pages) to review every page manually.. and sometimes changes on one page have an effect on other pages.
The remark was that links were difficult to see in articles as they looked the same as the regular text.
That wasn't correct - I know that in my CSS I define links to be dark blue and underlined.
Checked it with different browsers, different versions, and yes the remark was correct; It seems there's a bug in Firefox and also in some IE versions, depending on compatibility mode.
For the layout of my website I use CSS (cascading style sheets). This is a file that is referenced from every page on my site, that describes how html elements that make up the website look like.
If I want to change the red, white and yellow/orange background on my site into other colors, this is one change I have to do in this file and it's immediately changed for all pages.
Style sheets are cascading - you can put html elements inside others and they will inherit all settings from their parent element unless it's overruled at a lower level.
Now it seems there's a bug with this inheritance/cascading for the text-decoration property of links.
I set text-decoration:none; on links at high level in the page layout.
This is to prevent the language links, footer links and others to not show up in blue and underlined, like links look like by default. Also on the homepage all large titles are links, but they don't look that way - as I want them to look like large titles.
On a lower level in the html layout, there's a box that contains the actual text of the article (the yellow looking background, which is inside the large white box). There I overrule with text-decoration:underline on links. And that did not work.
Seems there's a bug and once you set text-decoration on a div, nested divs will keep this layout, even if you overrule it.
I fixed it by not setting the text-decoration:none at the highest level anymore. Luckily when I made the layout for this site I put enough containers around each part (language select, footer, topper, main content, menu linsk, ..) so I can set the properties for each div and span tag individually. With a few changes in the css (and none in the html pages of each article) it should look fine now.
Header/footer and main page do not show links as underlined, but within text of articles they should be dark blue and underlined.
The css file is cached on your browser, so if you have visited my site a few days ago you have to refresh once on a page with Ctrl-F5 to see the change.
Monday, October 3, 2011
Check your batteries !
Not the first time I blog about this, I have a warning on my site also to make sure people check for leaked batteries in their pinball machines and regulary replace them.. but still, even I get affected by them :-(
I know it's my own fault, should have listened to my own warnings; but every time I think I should check the batteries in all my games I just postpone it and then forget about it..
A week ago I switched on my Attack from Mars pinball machine and got the Factory settings restored warning message. Oops ?!
Opened the backbox, checked the remote battery holder, and saw that one of the batteries had leaked.
It had already happened a while ago, I just threw the whole battery holder away. They're cheap and I'm not bothering with cleaning it up and taking a risk the damage is still there.
The batteries were old, probably over 5 year.. same type as those in my CV that leaked last year. Can't remember when I bought and installed them.
Installed new batteries tonight (finally spent some time in the gameroom), made some adjustments (free play, 5 balls, ..) and started to play. After winter I really have to shop this machine. One rollover switch doesn't work, one popbumper doesn't work, .. not much fun to play anymore. Still need to install less powerful flippercoils (they're brutal now) and I also have new cabinet decals.
Played a few games, best result was just over 7,5 billion, just enough to put a GC score.
I should not have played but inspected all my machines to check their batteries.. but I didn't. Maybe next time I have some spare time in my gameroom. Or maybe not, they're all in remote battery holders.
Maybe I'll just wait until the next factory settings restored message;.
Wednesday, September 14, 2011
History of pinball in the USA
Just put a new article online - the history of american pinball manufacturers.
The large, known brands of pinball machines were in control of only a handful of people.
Holding companies or subdivisions went bankrupt, were taken over, ..
The large, known brands of pinball machines were in control of only a handful of people.
Holding companies or subdivisions went bankrupt, were taken over, ..
Friday, September 9, 2011

Spent two evenings desoldering corroded parts on the Black Hole Sys80 cpu.
Used sandpaper to get rid of the corrosion (forgot to take a before picture).
Finally used vinegar (it's an acid you need to neutralize the base fluid that has leaked out of the battery), scrubbed everything well, rinsed the pcb, ..
Now it's ready to solder in new parts and check all traces. The thick trace at the bottom left corner is broken where it connects to the bottom left pin of the ic above it (of the 2 the most right IC).
Update: soldered all the new parts in place. Found two broken traces, fixed with jumper wires.
Now tested the cpu. It's dead :-( Will have to review all connections and parts to check they're soldered well and there are no shorts anywhere..
Monday, September 5, 2011
Black Hole repair part 4
Found the problem with the locked on popbumpers - like I posted at the end of the previous post, the +5v is indeed missing at the boards.
Traced continuity back to the cpu board (A1J6 iirc) so the wiring or connectors are not the problem.
Investigated the trace on the board and found the problem, battery acid ate a small trace right at the bottom corner of ic Z3 (or Z2, don't remember, the right one of the two).
Soldered a small jumper cable over the trace but only got about 2,5 volts.. so decided not to hack the cpu further but first repair all the damage completely. I still have a battery damage repair kit from GPE that I bought years ago.
Double checked all components are present, marked them on the paper sheet, so I know what parts I have to desolder.
Then I'll clean up and check continuity on all traces.
Also found a new problem - the voltages on the power board are much too high :-(
5v was 8, 64v was almost 100, 40v was 68, 8v was 18, ..
Soldered the input on both transformers from the 220v to 240v tap, but that did not change anything.
So I will also rebuild the powerboard.
Thursday, September 1, 2011
Black Hole repair part 3
Worked for a few hours more on my Black Hole. My deadline to get it working by the end of August has passed :-(
Spent yesterday evening soldering on the driver board, did the optional ground modifications (about 10 jumper wires) like described on Clays repair guides (these are not online anymore).
Also played a bit with connectors, measures continuity, ..
The flippers suddenly work. Don't know exactly what did the trick.
Probably the ground modifications.. let's hope it keeps on working the next days :)
I did learn that you need to have 3 pinballs installed in the ballthrough for the flippers to work and Q to stay activated. Testing with the playfield in the up position (so you can see the relay) and then not having pinballs in the through, will make the relay not stay on. Doh.. so maybe this issue was solved before and I lost 2 days troubleshooting a non-issue..
Popbumpers still lock on immediately :(
Traced continuity in the ground and that's ok, from the green wire on each popbumper driver board, through the driver board, up to the large ground strip in the bottom of the cabinet.
There must be another short somewhere.. but I have no idea what to look for :(
Update: maybe missing +5 volts..
Monday, August 29, 2011
black hole repair
Continued working on the Black Hole tonight.
Found a problem with relay Q - this activated when you start a game and provides power to the flippers and popbumpers (which didn't work on my game).
The relay just doesn't activate.
When I closed it manually, I got a spark/blue flame at one contact point and fuse F4 blew. Oops..
After trying some things I noticed it was a problem with the popbumpers, the coils just locked on.
Disconnected all the popbumper driver boards. Connected them one by one.. results aren't good :(
Four popbumpers lock on immediately.. Two others don't work at all.
I found 2 popbumper driver boards (untested), put these in but the coil locked on immediately. So either I now have 6 broken popbumper driver boards or something else is wrong..
Tomorrow I'll test the boards in my Haunted House.
Once I know these are ok, I'll investigate further what the problem is with relay Q..
Friday, August 26, 2011
Black Hole cpu is working
After a few days of not doing anything pinball-related, I continued working on my Black Hole this week. Learning a lot about Gottlieb Sys80 games now, as I have almost no repair experience with it. I only have experience repairing more recent games, there I know immediately what each connector is for, how to troubleshoot problems, .. with this game I have to search the schematics each time, find my way under the playfield and in the cabinet trying to locate the part, ..
Tested the cpu board in my Haunted House. It had been fixed by Leon (of www.pinballeon.com) many years ago.. but as there still was battery damage visible on the board which never had been correctly repaired, I expected the board not to work anymore by now. I do have a kit to replace most of these boards, bought once from GPE.
Much to my surprise the board still worked and booted ?!
I had put it in my Haunted House (not connecting the cable going to the driverboard) and all displays show 0000000 so it boots. Nice !
I still intend to neutralize the battery damage and install the parts of the kit - but for now I can continue testing to get the machine working.
Next step was to replace the connector going to A1J6. This is the connector at the bottom left of the cpu board, right under the battery. This had been replaced by a universal jamma connector. Put a correct type of connector housing on it, made sure al wires were in the correct position, ..
In the past this jamma connector may have been installed incorrect (reversed, or maybe a position shifted), so this may have damaged some of the ics that deal with the switch inputs.. not sure yet but it's an option I have to take into account when troubleshooting things.
Connected everything, turned on the game. Machine boots correct. Displays work. Put a credit on the game, this works, the machine even makes sounds.
Press the start button.. yes, a ball gets kicked into the shooter lane. Excellent ! For a moment I had hope this machine could be played real soon..
Then the good news ended. Flippers don't work, popbumpers don't work.
Simulated a game by closing targets and switches, most of them worked.
Drop target banks reset when all targets are down.
Then went into the switch test. Some switches don't seem to work :(
Still have to investigate if it's located on the cpu or on the playfield.
Then started a game again. Weird thing was suddenly almost nothing worked :(
Score stayed at 0 points, closing a switch didn't do anything, droptarget banks didn't reset when all targets were down ? :-(
Went into the selftest. All 6 controlled coils work.
Tested the switch matrix again. Most register.
One weird thing is that switch 34 doesn't work always, which is seen by the cpu as one switch but are physically more switches on the playfield.
It works behind the center triangle plastic at the bottom left and at the bottom right. But in the middle of the playfield it's also located behind a rubber, and also at the top behind the droptarget banks, and there it doesn't register ? So I hope it's an easy problem like a broken wire on the playfield (well easy - may not be easy to trace and detect where it is broken.. we'll see..)
Have to work on this switch problem later and double check each switch if it works..
Noticed something else weird in the selftest and audits - going through the audits (nr 1 to 15) it shows junk on the display. No real numbers, just random segments lit. But at bootup it correctly shows 000000, so probably this is because there's no battery installed in the game, and the cpu has random data for audits ?
Also have to find out why flippers and popbumpers don't work. Had inspected all fuses and they seem fine, so will now trace from the bridge rectifier to check for power and continue further..
My goal is to have this game working by the end of the months, only one week left.. so I expect some late nights coming up.
Friday, August 19, 2011
wpc boardset article
Put a few more articles online the last weeks.
Introduction to the WPC boardset. An overview of all boards used in the WPC games (Bally / Williams games from 1989 till 1998. In a lot of other pinball 101 articles I talk about the fliptronics, cpu and powerdriver board but never explained which board is which, the differences between revisions, ..
Different country settings and their influence on WPC games.
This article goes further on the previous one. On the cpu board of WPC games there are jumpers (or dipswitches) to set what country a pinball machine is in. Article is an overview of all the things that are influenced by these settings, which may be many more than you'd suspect or probably have ever seen..
Furthermore I've done some behind the scene changes to the website - all so it'll load faster.
Optimized the current css so it's much smaller.
Added a new css for mobile devices, so they can browse the site better. Seems to work, in June and July together I had about 2300 visitors from a mobile device, while in the first half of August I had already around 900..
Optimized the compression of all images, especially on picture intensive pages like visits to shows this will make a huge difference in loading time.
Finally played a bit with http parameters like cache settings, changed them for the different types of documents. Especially if you browse many pages or are a return visitor it'll help speed things up a bit, compared to before..
Monday, August 15, 2011
new belgian pinball forum
For the belgian and dutch people: since this weekend a new pinball forum has started: flipperforum.be.
Some belgian pinballers decided to start their own forum.
A lot of people have already registered, so if you want to meet/chat with belgian and ducth pinballers: join !
Links to the forum will be updated later this week on my site..
Some belgian pinballers decided to start their own forum.
A lot of people have already registered, so if you want to meet/chat with belgian and ducth pinballers: join !
Links to the forum will be updated later this week on my site..
Sunday, July 31, 2011
Gottlieb Sys80 ground modifications
Started to work on my Black Hole pinball machine. Bought it many many years ago, untested.
Never tested or repaired it. Shopped it, cleaned the playfields, new rubbers, ..
then put everything together (I did test voltages on the powerboard)
Put everything together, started a game, it worked, and then a coil in the back fired and the game just died. Aaargh. Should've known better; but I was young and ancious to get it going.
Put it aside for many years, never worked on it as other games came in and got priority.
Now I'll finally start working on the game and try to get it going.
My Haunted House machine is in good working condition, but never got any upgrades.
As they're next to each other, it's easy for me to do the same upgrade to both machines at the same time.
I've done all the mandatory ground modifications as was described in the past on the pinrepair website. Most of this info is also available on flippers.com and other gottlieb repair sites, in case you need it.
Now all grounds are tied together, should make these System80 games more reliable.
As my Black Hole is the European version (no infinity lights or double backglass), the backbox is smaller and pcbs are at the backside of the light insert panel. So it wasn't an identical installation on both games, some wires needed to be different in size, also have a few less boards than in my HH or USA version BH.
Also noticed the sound board in my BH is incorrect, BH is game number 668 and the board in my game has eprom 667 installed (Volcano).
Not a real problem as I bought a NOS Black Hole sound/speech board many years ago :)
But my game must be working before I try to add that..
I always double checked my work with the dmm to make sure there wasn't an error or short somewhere.. switching the Haunted House on to test it was a bit scary (you never know I made a mistake and blew something) but everything worked.
Great ! Now my Haunted House is more reliable and step 1 on getting my BH working is done..


Tuesday, July 26, 2011
Tron LE 1.1 rom version
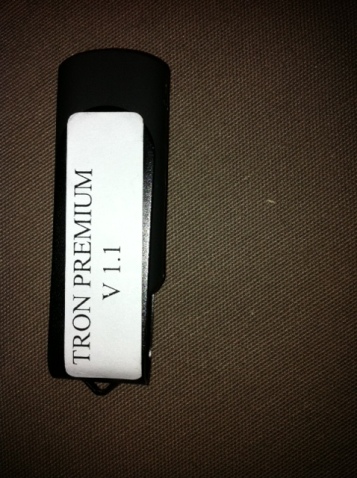
Following my post of a few weeks ago - Stern has released version 1.1 of the software for Tron LE. These are indeed shipped on usb keys to buyers of the game.
Thanks Erik for the photo.
Friday, July 22, 2011
Whitewater adjusted
Opened up my Whitewater pinball machine this evening - someone was looking for a part and I still had it. I keep my game-specific spare parts inside the cabinet of the game so they're always together.
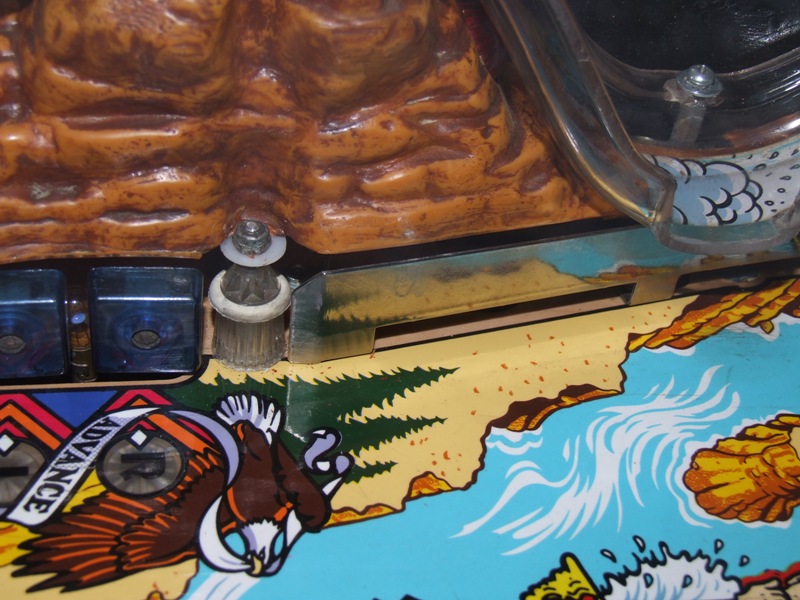
Now I had taken off the glass, I thought of having a look at the left side of the playfield. Slow or fast balls sometimes take a different path, sometimes they nicely bounce onto the flipper, sometimes they just drain. It seemed to depend on the speed but not always.
I was certain it had to be with the end of the metal rail that goes all along the back, at the left side of the playfield (somewhere along the middle) it ends, there's a post and then there are the blue river targets.
I remember when I shopped the game a few years ago that I had bent the end of the metal so the ball would nicely go onto the left flipper.. so why didn't it stay consistent anymore ?

I pushed against the metal.. and it moved.
Wow - wait, let me try that again.. hmm.. moved again ? that's not good !
Partly removed the long ramp, removed the mountain plastic underneath it and I could finally access the part behind the metal guide.
Seems the screw hole at the end of the part was too large, the screw could move around a bit.
Put some parts of a toothpick in it, secured it again.. and now it's tight.
Let the pinball roll by hand a few times, slow, fast, and it always ended nicely on the left flipper (or could just be caught by the tip of the flipper). But certainly no more drains SDTM !
Assembled the mountain and ramp again, played a few testgames, and my Whitewater suddenly behaves. It's like a total new game !
I know adjusting and fine-tuning a game is important and I always try to do it as good as possible (although I have to admit most of my games can need a little bit more of tuning), but this is the first time that one little half loose screw made such an important change to gameplay.
Now I had taken off the glass, I thought of having a look at the left side of the playfield. Slow or fast balls sometimes take a different path, sometimes they nicely bounce onto the flipper, sometimes they just drain. It seemed to depend on the speed but not always.
I was certain it had to be with the end of the metal rail that goes all along the back, at the left side of the playfield (somewhere along the middle) it ends, there's a post and then there are the blue river targets.
I remember when I shopped the game a few years ago that I had bent the end of the metal so the ball would nicely go onto the left flipper.. so why didn't it stay consistent anymore ?
I pushed against the metal.. and it moved.
Wow - wait, let me try that again.. hmm.. moved again ? that's not good !
Partly removed the long ramp, removed the mountain plastic underneath it and I could finally access the part behind the metal guide.
Seems the screw hole at the end of the part was too large, the screw could move around a bit.
Put some parts of a toothpick in it, secured it again.. and now it's tight.
Let the pinball roll by hand a few times, slow, fast, and it always ended nicely on the left flipper (or could just be caught by the tip of the flipper). But certainly no more drains SDTM !
Assembled the mountain and ramp again, played a few testgames, and my Whitewater suddenly behaves. It's like a total new game !
I know adjusting and fine-tuning a game is important and I always try to do it as good as possible (although I have to admit most of my games can need a little bit more of tuning), but this is the first time that one little half loose screw made such an important change to gameplay.
Thursday, July 21, 2011
Magic Girl - the newest pinball machine from John Popaduik
Here's a scoop - John Popaduiks new game will be called Magic Girl !
His site http://pinballinventor.org/ existed already some time. In 2 days the details about his first new game will be released.
What I can say is that only 13 will be created, price will be $15.995.
Start saving ! :)
Here is more information about the new Magic Girl pinball.
Update: link went public on 23/7 and all 13 games are now reserved..
Tuesday, July 19, 2011
I'm talking Tina, and here is your extra ball
One of the legs of my TZ wasn't fixed like it should - the screws were worn out and had bolts at the inside. Still there was a little bit of room - which probably caused my tilt during litz a few days ago.
Bought last week some leg plates and new bolts so tonight I installed them.
Noticed too the front wasn't completely level (one leg touched the ground a little bit earlier than the other when you put the game down, and the cabinet twisted a bit).
The game also wasn't setup very steep, leg levellers were out quite a bit.
I just adjusted the one leg so both front legs are level, nothing more. It was less than half a cm (probably 3mm) out, only took me 2 or 3 turns of the leveller.
The game suddenly plays a lot better. It's less agressive (less drains to the outlanes). I also put it to default 5-ball settings (which enabled extra balls).
Played two games, one of 250 million and one of 595 million. Not bad.
I hope the frustrating less than 100 million games are gone now.
Sunday, July 17, 2011
LITZ baby !
Played TZ again tonight. Had a few bad games - although bad - same as usualy, drain, drain, good ball, drain, make mistake and drain I finally got a bit more into it.
Some drains you can't do anything about, the ball leaves the popbumpers in the wrong direction and is soo fast it drains before you notice.
Peter of gamebunker also blogged about my TZ and how it's almost impossible to play.
Half of the drains are my own mistake. TZ is not a forgiving game. Every shot must count and be where you want it to be. Miss a shot, the ball will bounce somewhere and drain. Let the ball bounce around out of control, and it'll find its way to the outlanes. So you need ball controll all the time and aim and not miss.
Finally I got a good game ! Lit all door panels and was able to start Lost in the Zone (LITZ). Unfortunately I drained during this multiball - have to adjust the tilt because it just is too sensitive. But I finally put my initials in - grand champion with 909 million. I'm happy!
Thursday, July 14, 2011
Transformers for next Stern
Transformers is confirmed as the next Stern game, this was in a documentory on CNN about Stern pinball.
Great theme - so lets make it'll be a great pinball too ?!
Jersey Jack Pinball has also announced that their next game (after Wizard of Oz) will be Elvira - seems they're in negotiations with her. This would be the third pin with Elvira as subject (after Elvira and the Party Monsters and Scared Stiff).
Sounds even more interesting to me ! I wonder if people now will skip WOZ to get Elvira ? (I know I would if I was planning to buy one..)
Wednesday, July 13, 2011
WPC technical articles
The start of some technical articles,
made an overview of all WPC boards and what games they were used in.
Also explained how to add an NTC to a System11 pinball machine, to prevent the main fuse of your house from tripping when you turn on a pinball machine.
It's a problem I had many years ago myself, seen it recently at someone else's place, but don't know if it has been documented somewhere online.. so now it is :)
Monday, July 11, 2011
hacked powerdriverboard
Blogged a few weeks ago about a hacked Fish Tales, here are finally the pictures of the soldering on the powerdriverboard (bad quality, taken with my crappy cellphone).

Because someone had added some jumpers like pinrepair suggest but made a mistake in them, they had created a short on this board.. search for the vaporized trace.
It starts at most right pin of the 2nd connector on the left, and goes along the bottom of the board (3rd trace from the bottom) and continues underneath the black capacitor. Most of it was just gone, only a shadow of where once some copper had been was left..

Bridge rectifiers also had been replaced and soldering wasn't done very professionally. Too much heat (and the game didn't work because some small traces that go to the legs of the bridges didn't have continuity anymore because they were just burnt). Some traces and the board was just burnt, thick blobs of solder where hanging around, ..
Seems they didn't have enough bridges with pins so they used the type with fast-on connectors. Bridges with fast-on connectors are easy to find here in Europe - the type with wires like used on WPC driverboards is not available in most electronic stores. So I can understand the reason why some repair persons use this type or bridge, it's not the first time I encounter it.
To connect this to the board they didn't use wires (like I've seen in the past). The legs of the old bridge rectifier had been cut off pretty high, so that the metal pins were sticking up. Fast-on connectors had been soldered onto these legs. The bridge then just snaps into place. Makes it a lot easier to replace in the future, no soldering is required anymore ! :-)

The back of the board didn't really like the heavy soldering of these fast-on connectors.

Because someone had added some jumpers like pinrepair suggest but made a mistake in them, they had created a short on this board.. search for the vaporized trace.
It starts at most right pin of the 2nd connector on the left, and goes along the bottom of the board (3rd trace from the bottom) and continues underneath the black capacitor. Most of it was just gone, only a shadow of where once some copper had been was left..

Bridge rectifiers also had been replaced and soldering wasn't done very professionally. Too much heat (and the game didn't work because some small traces that go to the legs of the bridges didn't have continuity anymore because they were just burnt). Some traces and the board was just burnt, thick blobs of solder where hanging around, ..
Seems they didn't have enough bridges with pins so they used the type with fast-on connectors. Bridges with fast-on connectors are easy to find here in Europe - the type with wires like used on WPC driverboards is not available in most electronic stores. So I can understand the reason why some repair persons use this type or bridge, it's not the first time I encounter it.
To connect this to the board they didn't use wires (like I've seen in the past). The legs of the old bridge rectifier had been cut off pretty high, so that the metal pins were sticking up. Fast-on connectors had been soldered onto these legs. The bridge then just snaps into place. Makes it a lot easier to replace in the future, no soldering is required anymore ! :-)
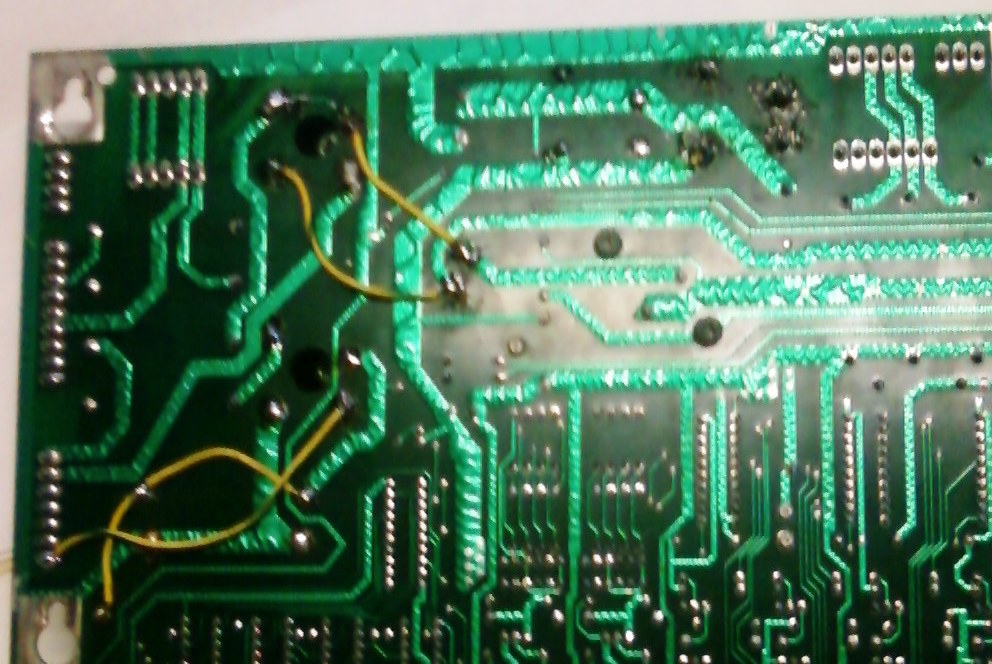
The back of the board didn't really like the heavy soldering of these fast-on connectors.
TAF nailpolish

This is something I noticed a few years ago when I had a NOS Thing hand for sale from The Addams Family pinball machine, but only recently was able to take a picture from it: there's nailpolish on the fingernails on the plastic hand !
What level of detail did Bally / Williams back then to their pinball machines ? They did not just mold a plastic hand but even have someone put nailpolish on it to make it look more realistic ? While it only comes out of the box for a few seconds, and it's all the way in the back of the playfield so most players wouldn't notice this anyway ?
A pinball manufacturer nowadays would probably take a flat plastic and put a crappy photo of a hand over it..
And as over 20.000 Addams Family pinball machines have been produced - someone had to put nailpolish on over a 100.000 plastic fingernails ?! Can you just imagine this person coming home from work ?
- 'Hi honey, how was your day ?'
- 'Not bad, put nailpolish on 100.000 plastic fingers.'
Sunday, July 10, 2011
Black Indiana Jones
There's not only the limited edition Black Spiderman, I came across a rare Black Indiana Jones ! :-)
And my phone overexposed the image, in reality it was even more dirty than it looks, the white around Indys head was much darker than it shows here..
It was unbelieveable how dirty this game was. Hadn't been cleaned in many years. At the lower part of the playfield rubbers had been replaced (long ago) with black rubbers that were totally hard and dry now.
At the top of the playfield the original white rubbers were still on (from 1992..) almost 20 year old rubber was totally hardened and fell apart. Underneath the mini-playfield the rubbers that should be there were just broken and missing.

Monday, July 4, 2011
Started to play my Twilight Zone again
Since last week I have room again in my gameroom ! Before I had an extra machine in for a restoration.
That Medieval Madness is now gone, and now I finally could set up the Little Pro mini golf game. The Little Pro was disassembled since last year in my gameroom, it was in the middle path of the gameroom, in front of my Bram Stokers Dracula and Twilight Zone pinball machines.
So yes, I couldn't play any of these games for almost a year.
To be honest, I even think it was about 5 years since I played Twilight Zone.
OK, I may have played like two to ten games a year on it.. not more.. but that was not really playing, really trying to get a highscore, enjoying the game.. it was more to check if the machine still worked.
A few years ago we even had decided to sell our Twilight Zone as we didn't play it anymore.. but in the end played a few games on it again and decided to keep it anyway.. as it's in such good condition, it would be nearly impossible to find one again should we miss it.. but not that we really play it often.
Since three days now I'm again addicted to Twilight Zone. I really want to set a high score and enter my initials.
That's the goal I've set to myself. The machine has reset to its default settings and high scores, so about 600 million is needed.
Not too high.. should be a possibility for me you'd think ?
First put my electronic level on the playfield, the game was tilted almost 1 degree to the right. No wonder the game played weird. Now it's level. But I think I still need to adjust the playfield tilt and make it either more or less steep.
Like it is now set up, the game is just brutal. I've always hated The Addams Family because the magnets can drain the ball so quickly you can't do anything at all anymore.. but my Twilight Zone is even more a drain monster !
I've had more drains the last days than you can imagine and had more than one game that went like this:
- ball 1: skill shot, rocket kicker, popbumpers, left outlane.
- ball 2: skill shot, rocket kicker, popbumpers, right outlane.
- ball 3: skill shot, rocket kicker, popbumpers, sdtm.
aaaaaaaaaaaaaaaaaaaaaaaaaargh
game over without the pinball touching the flippers at all.
Other times: skill shot missed - slotmachine kickout - want to catch it on the right flipper and sometimes it bounces up and goes straight into the right outlane. Why ???
I've had dozens of games where at the start off ball 3 I had less than 10 million points (which is what you can earn with one successful skill shot).
Setting a high score seems an impossible task :-(
I did have a few good games - about 5 times I got between 500 and 550 millions. So almost there.. just have to be a really good game with every ball and I'll get there, I'm sure.
It probably also doesn't help that it's been about 10 years since I shopped the game.
While it is still pretty clean (as it's hardly been played), the rubbers are dead. The red flipper rubbers should be bouncy, but they are not.
I've had ball drains whilest trying to pass the ball from one flipper onto the other, because it didn't bounce hard enough off the flipper tip.
So next on the list is to put fresh rubber on this machine and see how much of a difference that makes.
It probably also doesn't help I'm still recovering from pneumonia. My reflexes are too slow, half of the time I see the bal drain and think 'maybe I should've tried to nudge the machine to rescue that pinball'.
But no more excuses. I should be honest: I'm bad at playing pinball.
Don't get me wrong - I love pinball machines. I love to play them, I love to work on the machines, but I'm just not a good player.
I'm just too bad. I haven't played in the belgian pinball championship for years as I'm not well enough so just don't bother (my goal usually is to be in the top half, but in reality I'm somewhere 2/3rd down the list). The competition is held in january, and I only play often in my gameroom during summer. As from october it gets too cold and I almost don't play anymore. So in january I've totally forgotten how to play pinball and do even more stupid mistakes that frustrate me because I know I should do better but it's been too long since I played.
It's not that I'm really bad a bad player - on a game that fits me I can get high results and get a top 5 score.
The problem is if a game doesn't fit me. I'm not good at nudging, trying to save and keep the ball in the game at all cost, .. then I drain with very low points, which gets my ranking down quickly.. and to do well on competitions you have to average well on any game, and do your best with every ball.
This weekend also was the TIF: Italian pinball championship. The previous two years we visited it, but not this year.
Two years ago we included it with the start of our holidays, last year we even drove especially over there for a weekend.
Not this year. It's just not a good weekend (first weekend of july is the start of the summer holidays, so everyone is driving to the south of Europe with large traffic jams as a result. Last years drive was too exhausting, and this year it would have taken many hours more.. this was not worth it..
I feel sad about it as I loved to meet my Italian friends again, I love to meet pinheads, I love to play all those unknown games I've never seen before..
Maybe one day I'll practice more playing pinball and become a better competition player.. but I've been telling this to myself the last years and I seem to play less and less. I'll just forget about playing championships at all and just concentrate on repairing and restoring these great machines..
Wednesday, June 15, 2011
PinLed replacement cpu installation
Installed a Pinled replacement WPC cpu board in a Hurricane.
The game had damage on the original cpu board because of a leaked battery.
It had switch matrix problems, some switches wouldn't register well, when you went in test, the game always went back out of the menu, turned the sound down, ..
While it is possible to repair this, it takes a lot of time and when you don't repair everything, it's possible that the damage will still continue to spread, and somewhere in the future the board will break down again.
With new reproduction cpu boards available for a reasonable price, it's usually better to buy a new board, than to pay someone a lot of hours to repair the damage and replace all the resistors/diodes/ics that are in the area below the batteries.
So a new reproduction WPC cpu board was bought from www.pinled.de
Its size is the same as the original board, connectors are in identical positions.
What I found odd was that there was no documentation at all provided together with the board.
There are 3 ICs you need to replace, one of which is the ASIC.
You need a special tool for this, don't try it without !
Replaced the 3 ic's, put the new board in.. didn't work. Damn.. did I by accident damage the asic or another ic ? There are also some dip-switches, maybe they needed to be set.. but no documentation on how to do it, there is only some printed text on the board.
To be sure I put the ic's back onto the original board. This still worked. Good news, I didn't damage them. Then put them again on the pinled reproduction board.
Checked the website, searching for information about these jumpers.
All our boards come with detailed installation instructions.. yeah sure :-(
Found a page with installation instructions in german and english for all of their boards.. all of their display boards that is - but not for boards 10036 and 10037, which are their WPC and WPC-S replacement boards.
So time to read the small print on the board and try some settings.
All dip-switches by default come in the off position. The board won't work like that :( The game seems to reboot the whole time, of the 3 leds on the top left of the cpu board, the bottom will stay on, and middle will blink 1 time. As on the original cpu board, the top one should go out, bottom stay on, and middle should go on/off all the time.
Dipswitches 1 and 2 are set according to the eprom size. 512/1mb, or 1/2/4mb.
Therefor you set them on/off or off/on.
The other switches have something to do with ram size and battery settings.
Some of their default presets are printed on the pcb.
Anyway I just started testing some combinations and finall got the board to start.
Don't remember exact settings, I'm certain it was set for 1/2/4mb, don't remember if the other settings about battery were all off or some on.
Once the board worked, I had no issues with it. It works identical to the original board. The game played well, all tests, settings and adjustments were done, ..
So when you have a battery damaged board that has switch matrix problems, just buy a new one. It works - but it would be a bit better if pinled would provide it with installation instructions for the dipswitch settings (or let you say for what game it is so they already set it)
Tuesday, June 14, 2011
Flat IJ
Went to look at an IJ with flipper problems, the coils got very hot and weak.
Another known repair person had already tried to help the owner by email, but when he contacted me, he suspected the problem to be on the fliptronics board and the owner couldn't test this himself.
Went over there, put the game into switch test, pushed the flipper button, noticed the switch didn't nicely stay on but switch on/off rapidly.
Cleaned all the optos inside the cabinet near the flipper switches, and the problem was solved.
Not really a type of problem that a repair person has to do a house-call, probably this could've been done by email too.
What could not be found by email was the other problem on this game.
Played a testgame, noticed the ball got stuck on the top of the droptarget in front of the captive ball. OK remembered I had to adjust this (there's a screw at the bottom of this target to adjust its height).
When multiball started, the ball also got stuck on the edge of the lock plastic, it made the sound twice before the ball rolled out. Asked the owner about this, he said the game always did this..
And then I noticed when a ball got out of the popbumpers, it really rolled very SLOOOOOOOOOOW back towards the bumpers.
I look under the game and what do it see ?! This game is levelled incorrectly.
The owner had this game for three years, and probably switched the front and back legs when installing the game. There wasn't much difference between them (it's not that the playfield sloped down to the back), but the front leg levellers where more turned out then the back.
Adjusted this, and the game played suddenly a lot faster !
(don't know if the owner likes it now :-)
It's not the first time I see this - I know another pinball machine owner that writes on the legs where they go - so LF, RF for left front, right front, ..
same legs goes on same place, seems easier than to level the game himself..
While that's not difficult to do, I wrote an article about how to level a pinball machine.
Thursday, June 9, 2011
hacked fliptronics 2 board on a fish tales
Been repairing a Fish Tales.
The powerdriver board was very badly repaired.. don't have pictures available now, they're still on my phone and I have to upload them to my pc (don't have a smartphone...)
All bridge rectifiers had been replaced in the past, but the soldering was done very badly. 3 different types of rectifiers were installed (some with fast-on lugs, some with wires, ..)
Using an incorrect type of bridge isn't a problem on itself. The problem was the bad soldering to keep them in place. Only the thick traces were actually connected to the bridge. And not all of them, some pins have traces at both the top and bottom of the pcb, and sometimes only 1 side was soldered. Some traces were burnt around the pin hole.
There are also a few very small traces going to the bridges, and they didn't make continuity.
One of the capacitors was also loose. Just replaced it and made sure it was soldered well (making continuity on both sides of the board).
I had so much fun desoldering everything, replacing the bridges and trying to figure out how every trace should be connected. :-/
It seems the repair person had read Clays guides as there were some jumper wires in the back added (not all of them like Clay recommends). Unfortunately one jumper was totally wrong !
The previous repair person probably made a mistake and switched the numbers of 2 connectors around.. it had to go to J104 pin 1 and went to J101 pin 4 (or something like that, going from memory here). Anyway, this gave a big short, and the bridge was dead.. this probably made one large trace on the board just disintegrate.
After all my work the powerdriver board was done, this pinball machine booted fine.
All leds on the powerdriver board lit up, the cpu got its voltages, ..
All coil worked, switches also, .. I was happy to see there were no playfield issues. At this point I had expected to have found some stuck on transistors and burnt coils too..
The only thing wrong with this pinball machine was that the flippers did not work.
Power was present on the flipper coils, connecting the middle lug of the flipper coil to ground activated the flipper... the flipper buttons themselves registered fine in switch test.. so problem was on the fliptronics 2 board.
Removed the board and then I saw this:

aaah.. so nice. A totally burnt away trace. It was enough for me not to try and repair this on location (it was getting late) but to take the board back home.
Now I've inspected this more closely, I notice this burnt trace isn't a problem anymore. On the back it has been jumpered with a wire. I do wonder what happened to this machine, as there was 1 trace burnt on the powerdriver board and also this one on the fliptronics board. These are pretty thick traces, to have them completely disintegrate like this you need quite some voltage hooked up wrong..
Anyway, the board didn't work even with the jumper.. so inspecting it further I noticed the row of burnt resistors ! R13 to R20 (the whole horizontal row of resistors below the 8 transistors - click on the image to see a larger version) are all brown and broken. They're burnt in the middle, probably acted like fuses..

Don't know what happened to this fliptronics board (I assume too many voltage) but I'm afraid the board will not work after just replacing these 56ohm resistors..
When I look at the schematics these resistors are somewhere in the middle between a lot of other components (like all the transistors). If they were the first thing in the schematics near a connector, they could have acted like fuses and protected the rest of the circuit.
But now they're in the middle of the circuit.. so I'm pretty sure that other small components (like the 8 smallest transistor, possible the ic's also) are damaged too.
Don't know yet if I'm going to put time into this board and try to repair it, or just get a new one..
Wednesday, June 8, 2011
Tron LE security issues
Visited the local Stern importer yesterday as I needed to buy some parts.
Just wanted to quickly retrieve them, but as always staid too long talking about everything.
He had some interesting information about the Tron LE and parallel imports.
(all this I have just been told, haven't seen/checked/confirmed it myself, but it's a reliable source so I don't think any of this is incorrect information)
UPDATE: not a rumour - Stern does ship USB keys with updates.
Seems Stern is doing more and more to try to prevent grey import.
Not that Stern is completely successful, as in Europe there are USA Sterns being sold that are switched from 50/60Hz.
The cpu will detect if it's in the wrong continent (Europe or USA) and give an error message. So you can't just buy a Stern pinball machine in the USA, export it to Europe, plug it in (after converting to 220v) and expect the game to work.
Some dealers hack thecpu power board to bypass this detection, so they can sell USA games to Europe.
Problem is, this voids your warranty. If you buy a Stern pinball machine from one of these dealers because it's cheaper, if you ever have a problem with the cpu, you'll pay much more.. (unless the seller will back it up and replace it for you, which may be for the first months, but don't expect replacement warranty after a year or more..)
You can't go trough official channels to have the cpu repaired. Can't send it in Europe for repair as the serial number isn't registered for being sold in Europe.. You'll have to send it back to the dealer in Canada where it came from, but he can't send it back to Stern as they'll detect the 50/60Hz hack and will not repair the board.
So your warranty is only as good as the repair skills and goodwill of the dealer where you bought the game from.
Now this hasn't stopped people from buying these games. After all, big cpu problems don't often happen.
But when it would ever happen, the only way to get your game working is to buy a new European cpu board, which will cost you a lot more than what you saved by buying not from an official dealer.
It seems Stern has added some extra security steps with Tron LE.
Not just to prevent parallel import, but also to make the difference between the Pro and LE version bigger.
The LE games have a different cpu. Haven't seen one myself, but there should be a physical difference.
An LE cpu can only work in an LE game and accept LE rom updates.
Do not expect like with Shrek/Family Guy that you can upload any rom update and the game will accept this and work.
Only the Pro version rom will be available at Sterns website. This will not work on an LE model (and you wouldn't want this to work anyway as it would not do anything with the extra hardware you get on an LE and which is why you paid more for the game).
The LE rom image will not be available for download at all on Sterns website.
New versions will be distributed on USB sticks, one for each game. These sticks are sent to the dealers that bought the games, which in turn have to send them to their customers.
It seems the usb stick can only be used once and the pinball machine will delete the rom image on the stick once it's been updated.
OK as an IT guy I have my doubts about this security - files on usb sticks are easy to copy, don't know how hard the security will be for the pinball cpu to detect the correct stick is used and to use a similar cpu stick. But at least you need access to one original usb stick before you can try to copy them..
But anyway, suppose Stern is successful with this usb copy protection - it can be a huge problem for parallel import dealers.
If you ever want to upgrade the rom version of your LE game (and you probably will, given Sterns history), you cannot do this yourself anymore.
You have to hope that the dealer you bought it from, got enough usb sticks from his source, and provide one (for free ?) to you, and hope it works on your hacked cpu board. That's a lot of risk to take.
Your other option; keep the game forever on the rom it shipped with and be frustrated that people who spend a few $100 more get official upgrades with more rules, bugfixes, sound effects, animations, and whatever else that is possible with new rom versions..
Just wanted to quickly retrieve them, but as always staid too long talking about everything.
He had some interesting information about the Tron LE and parallel imports.
(all this I have just been told, haven't seen/checked/confirmed it myself, but it's a reliable source so I don't think any of this is incorrect information)
UPDATE: not a rumour - Stern does ship USB keys with updates.
Seems Stern is doing more and more to try to prevent grey import.
Not that Stern is completely successful, as in Europe there are USA Sterns being sold that are switched from 50/60Hz.
The cpu will detect if it's in the wrong continent (Europe or USA) and give an error message. So you can't just buy a Stern pinball machine in the USA, export it to Europe, plug it in (after converting to 220v) and expect the game to work.
Some dealers hack the
Problem is, this voids your warranty. If you buy a Stern pinball machine from one of these dealers because it's cheaper, if you ever have a problem with the cpu, you'll pay much more.. (unless the seller will back it up and replace it for you, which may be for the first months, but don't expect replacement warranty after a year or more..)
You can't go trough official channels to have the cpu repaired. Can't send it in Europe for repair as the serial number isn't registered for being sold in Europe.. You'll have to send it back to the dealer in Canada where it came from, but he can't send it back to Stern as they'll detect the 50/60Hz hack and will not repair the board.
So your warranty is only as good as the repair skills and goodwill of the dealer where you bought the game from.
Now this hasn't stopped people from buying these games. After all, big cpu problems don't often happen.
But when it would ever happen, the only way to get your game working is to buy a new European cpu board, which will cost you a lot more than what you saved by buying not from an official dealer.
It seems Stern has added some extra security steps with Tron LE.
Not just to prevent parallel import, but also to make the difference between the Pro and LE version bigger.
The LE games have a different cpu. Haven't seen one myself, but there should be a physical difference.
An LE cpu can only work in an LE game and accept LE rom updates.
Do not expect like with Shrek/Family Guy that you can upload any rom update and the game will accept this and work.
Only the Pro version rom will be available at Sterns website. This will not work on an LE model (and you wouldn't want this to work anyway as it would not do anything with the extra hardware you get on an LE and which is why you paid more for the game).
The LE rom image will not be available for download at all on Sterns website.
New versions will be distributed on USB sticks, one for each game. These sticks are sent to the dealers that bought the games, which in turn have to send them to their customers.
It seems the usb stick can only be used once and the pinball machine will delete the rom image on the stick once it's been updated.
OK as an IT guy I have my doubts about this security - files on usb sticks are easy to copy, don't know how hard the security will be for the pinball cpu to detect the correct stick is used and to use a similar cpu stick. But at least you need access to one original usb stick before you can try to copy them..
But anyway, suppose Stern is successful with this usb copy protection - it can be a huge problem for parallel import dealers.
If you ever want to upgrade the rom version of your LE game (and you probably will, given Sterns history), you cannot do this yourself anymore.
You have to hope that the dealer you bought it from, got enough usb sticks from his source, and provide one (for free ?) to you, and hope it works on your hacked cpu board. That's a lot of risk to take.
Your other option; keep the game forever on the rom it shipped with and be frustrated that people who spend a few $100 more get official upgrades with more rules, bugfixes, sound effects, animations, and whatever else that is possible with new rom versions..
Friday, May 27, 2011
Cheap pinballs are still available.. sometimes
Good pinball deals still happen.. but become more and more rare.
Checked out a Twilight Zone pinball machine that someone had bought in a local auction house.
At these auctions usually furniture is sold, pinball machines almost never show up.
The owner was lucky to be there at the right time, and got it for a very good price: 300 euro (about $450).
That's a steal..
The game is in reasonably good condition.
Service buttons were gummed up. Cleaned them and they started to register again.
Boards are exceptionally clean, looking almost brand new. No battery damage at all.
I get the impression this game was not on location for a long time, or it was a very clean location (not a bar where people smoke), as the inside was very clean.
Worst thing was that the mini-playfield was faded, above the magnets are red circles and letters, one was still bright red and the other had faded to almost white.
Main playfield looked good, no wear.
The game had some usual issues you encounter with TZ: slot machine plastic broken, target bent back.
Clock has a broken 12o'clock opto. Clock face was white with gold-colored signs.
No 3rd magnet or special signs on the mini playfield. 2 posts under the popbumper were installed.
This means the game is probably a very early production game. It was still on L-2 version roms.
All coils worked, except for 2 that had a broken wire.
Biggest problem was in the switch matrix, 2 rows are shorted to ground. Traced the problem back to the opto driver board under the playfield. The LM339 ic's on this board need to be replaced.
Sometimes I hear about people finding games for a very low price.. it's been a few years now, but this shows you these finds can still happen.
Thursday, May 19, 2011
MM flipper repair
When repairing a pinball machine, always check that genuine pinball parts are used.
I'm restoring a Medieval Madness. When the game came in I played a few games to have an idea how it felt, what parts didn't work well (so I knew I had to pay extra attention to them when I stripped the playfield down).
One of the things that I noticed was that the flippers were really weak. I could barely get a pinball up a ramp. But I assumed the assemblies were just worn and would replace them anyway whilst shopping the game.
I always replace the plunger/link, flipper bushing, coil sleeves and the coil stop.
The coils themselves were still good, the sleeve didn't stick into the coil and could be removed easily.
On this particular game I also replaced on end-of-stroke switch as a part of the long blade was broken and the flipper link would stick behind it, leaving the flipper bat in the up position.
But what this post is about - I noticed something really weird when replacing these parts. The flipper return springs were not pinball parts !

Although they looked similar, they were much larger and thicker than what has to go on there.

Here's an image of the large spring that was installed and the spring that should go on there. The larger spring is too strong, probably they caused the flippers to have not enough power. Had original springs been used the game would have played a lot better. Small things like a 50 cents spring can make or break how well a game plays.

The correct springs I had in my spare toolbox, in which a lot of small spare parts (springs, all types of screws, ..) are laying loose.
When I had installed the new spring and checked its tension, I noticed something was inside the little spring ?! See this picture - it's in the middle of the extended spring.
Quiz time: do you know what was hidden inside the spring ?
And no it's not an airgun pellet (although it looks like it), it is a part used on a pinball machine.
Btw when installing the new flipper return springs and the bushing, I noticed the base plate of the right flipper was of a different type than that of the left flipper.
It was of an older type of WPC pinball, as it didn't have 2 extra holes to mount the little spring in. It was the type of base plate that's used on the older wpc games that had a conical flipper return spring that went around the flipper plunger.
I noticed it was different but didn't think much of this. As I replaced the coilstop and flipper link I thought it wouldn't matter anyway - I should have known better...
When the playfield was totally assembled and I played my first game I noticed my mistake. The right flipper had less travel, whilst they were both aligned to be in the same position when down, in the up position the right flipper didn't come as high as the left flipper.
Big problem.. both flippers really need to act the same whilst playing.
My first thought - as you can see on the first picture was that I had used a generic part for the left flipper. The plastic link is a slightly different shape than on an original Williams part. Thought this maybe had a small size difference with another link which cause the left flipper to raise higher.
As the flipper assembly acts like a lever, a small change in distance of how much the plunger travels (because of a different coil stop for example, or plunger link), will be magnified at the end of the flipper tip.
Removed this whole plunger and link assembly and put a new, correct type in.
No difference, the right flipper still didn't raise as much as the left.
Then I remembered the difference in base plates, and I remembered these were slightly different and you needed to use the correct coil stops on them too (which I didn't have, only have 1 type of generic coil stop in my spare parts).
So I disassembled the whole right flipper again and replaced the base plate with a correct, more recent type.
The differences between both base plates are barely noticeable. Visually they look the same, same size, coilstop and flipper are mounted on the same distance, ..
But they are not the same.
You can identify them: there are less holes in the upright metal where the flipper return spring hooks in, and the flipper bushing is secured with screws that have loose nut on one type, while on the other type the nuts are glued onto the flipper base plate.
See the difference between the first (good) and third picture (wrong plate) - in the first the spring is stuck in a hole to the side, in the third picture there was no such hole present, it was stuck in a hole in the center.
I'm restoring a Medieval Madness. When the game came in I played a few games to have an idea how it felt, what parts didn't work well (so I knew I had to pay extra attention to them when I stripped the playfield down).
One of the things that I noticed was that the flippers were really weak. I could barely get a pinball up a ramp. But I assumed the assemblies were just worn and would replace them anyway whilst shopping the game.
I always replace the plunger/link, flipper bushing, coil sleeves and the coil stop.
The coils themselves were still good, the sleeve didn't stick into the coil and could be removed easily.
On this particular game I also replaced on end-of-stroke switch as a part of the long blade was broken and the flipper link would stick behind it, leaving the flipper bat in the up position.
But what this post is about - I noticed something really weird when replacing these parts. The flipper return springs were not pinball parts !
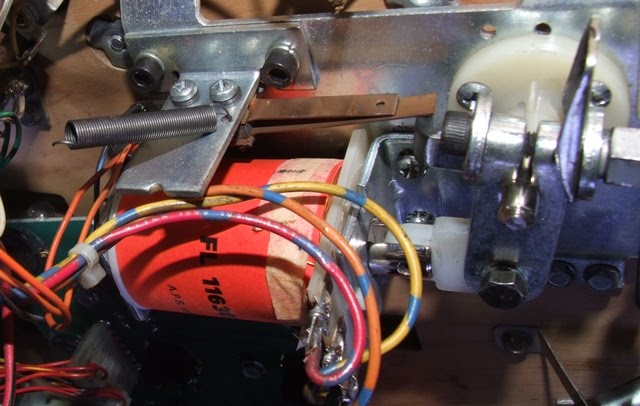
Although they looked similar, they were much larger and thicker than what has to go on there.
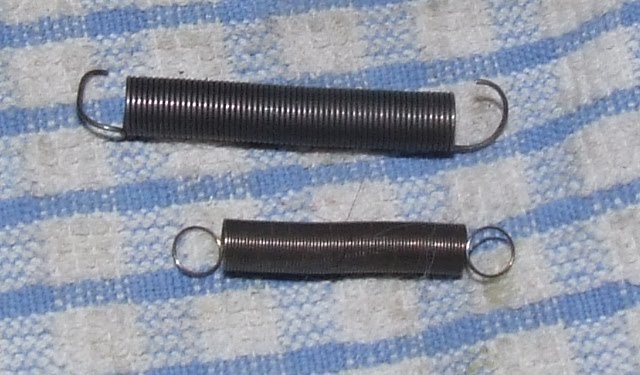
Here's an image of the large spring that was installed and the spring that should go on there. The larger spring is too strong, probably they caused the flippers to have not enough power. Had original springs been used the game would have played a lot better. Small things like a 50 cents spring can make or break how well a game plays.
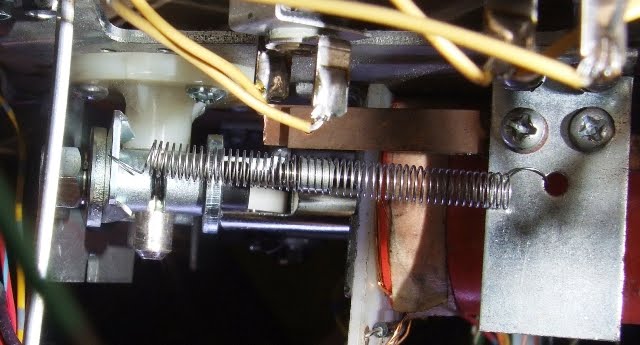
The correct springs I had in my spare toolbox, in which a lot of small spare parts (springs, all types of screws, ..) are laying loose.
When I had installed the new spring and checked its tension, I noticed something was inside the little spring ?! See this picture - it's in the middle of the extended spring.
Quiz time: do you know what was hidden inside the spring ?
And no it's not an airgun pellet (although it looks like it), it is a part used on a pinball machine.
Btw when installing the new flipper return springs and the bushing, I noticed the base plate of the right flipper was of a different type than that of the left flipper.
It was of an older type of WPC pinball, as it didn't have 2 extra holes to mount the little spring in. It was the type of base plate that's used on the older wpc games that had a conical flipper return spring that went around the flipper plunger.
I noticed it was different but didn't think much of this. As I replaced the coilstop and flipper link I thought it wouldn't matter anyway - I should have known better...
When the playfield was totally assembled and I played my first game I noticed my mistake. The right flipper had less travel, whilst they were both aligned to be in the same position when down, in the up position the right flipper didn't come as high as the left flipper.
Big problem.. both flippers really need to act the same whilst playing.
My first thought - as you can see on the first picture was that I had used a generic part for the left flipper. The plastic link is a slightly different shape than on an original Williams part. Thought this maybe had a small size difference with another link which cause the left flipper to raise higher.
As the flipper assembly acts like a lever, a small change in distance of how much the plunger travels (because of a different coil stop for example, or plunger link), will be magnified at the end of the flipper tip.
Removed this whole plunger and link assembly and put a new, correct type in.
No difference, the right flipper still didn't raise as much as the left.
Then I remembered the difference in base plates, and I remembered these were slightly different and you needed to use the correct coil stops on them too (which I didn't have, only have 1 type of generic coil stop in my spare parts).
So I disassembled the whole right flipper again and replaced the base plate with a correct, more recent type.
The differences between both base plates are barely noticeable. Visually they look the same, same size, coilstop and flipper are mounted on the same distance, ..
But they are not the same.
You can identify them: there are less holes in the upright metal where the flipper return spring hooks in, and the flipper bushing is secured with screws that have loose nut on one type, while on the other type the nuts are glued onto the flipper base plate.
See the difference between the first (good) and third picture (wrong plate) - in the first the spring is stuck in a hole to the side, in the third picture there was no such hole present, it was stuck in a hole in the center.
Sunday, May 15, 2011
Visitors from Finland, it's been busy weekend

We had visitors from Finland over this weekend.
I was contacted a few weeks ago by Teemu, as he was looking to buy pinball machines for sale in Belgium and the Netherlands and wanted some help finding them. Later Ari contacted me too, as he was going to go together with Teemu on this road trip.
This was great news. I had already contact by mail and on irc (#pinball) with Ari about 10 years ago. So I was looking forward to meeting him after all these years.
He's well known in Finland, he's a good player, and has a large website about pinball: apz.fi. (unfortunately almost completely in finnish)
Friday they arrived, we met and we already played some pinball.
Saturday we visited a pinball dealer here in Belgium where we filled their van completely :) Seeing five Medieval Madness pinball machines next to each other was impressive for all of us.
Later Peter from gamebunker.be joined us. The evening was spent in the historic city of Antwerp (you need to do some sightseeing and taste belgian beer), and we even played.. guess what, pinball.
Then we went to some bars in search of a bingo machine.. unfortunately in the first 2 bars we found that had them, all machines were occupied. So we played some Stern Iron Man pinball instead.
Finally we did find a bar with a bingo machine. Ari really wanted to play this type of machine on location..
After having watched people lose over 100 euro whilst we were playing a few games of pinball, we all were curious how well Ari would do.
Well he had been training at home, and said playing pinball had learnt him how to nudge a game skillfully. He put a bit over 2 euro in.. and in the end won 22 euro !
My task was to convince the bar owner to pay us out. After needing to buy another drink he did give us a 20 euro bill. Not bad! Getting 1000% return on your investment isn't bad for 15 minutes of work..
Although it probably won't work every time;. but still, he did much better than some guys we saw losing over 100 euro in those bingo machines..
Maybe this is what pinball needs to become successful again: all the people that are addicted to bingo machines, in the hope to win some money. You're doing it wrong !
Bingo is a gambling game, but your skill can influence it a bit.
First learn to play pinball very well, and use the skills you learnt to earn money on bingo machines.
Sunday we all went to the yearly open air jukebox show in Rosmalen. We visit this show every year.
There were not a lot of pinball machines, even less jukeboxes than previous years. More rock&roll, rockabilly, .. I didn't buy a lot, just a manual for Funhouse and Orbitor One. I'm especially happy with the O1 manual (even it's german) as the game is rare and finding a manual for it is also not easy.. (I only had a bad photocopy of the german manual). Also met some people there that we see every year at the show..
In the afternoon we had to say goodbye as our visitors had to start their long trip back home..
Over the years we've already had some other pinball visitors from abroad at our house (Germany, Poland, Netherlands, United Kingdom), but Ari and Teemu from Finland came from the most far away..
Thursday, May 12, 2011
Medieval Madness troll led modification
Been busy restoring a Medieval Madness the last weeks, it's almost ready.
I'm not crazy about modifications, but wanted to install leds in the eyes of the trolls.
This mod is developed and documented at iobium.com (through their store you can also buy it assembled).
But as I'm more a diy person and the parts only cost a few euros, I decided to do this myself. After all, the kit is very simple: 2 leds, a diode, resistor and some wires (for each troll head), how hard can it be ?
2 days ago I started. Disassembled the trolls, removed the switch and the troll heads. Drilled holes in the eyes.
Soldered 2 leds together like the instructions tell me to do. Put shrinktube around it. Then tried to install it.. and got really frustrated !
It's very difficult to do (maybe the wire I used was a bit too inflexible). You hardly have any space to work, the backside of the trolls face is closed, only at the bottom there's a small hole where the metal of the switch blade sticks through.
Succeeded into putting one led in, tried to get the next in position, first came out again.. repeat repeat repeat and then they decide to break. Aaaaargh.
Out of frustration I quit.
Continued yesterday evening. Can't leave the trolls with holes for eyes, I started it and need to finish this mod.
Took a hobby knife and just cut the backside of the troll open. Put one led in, held it in place with superglue. Waited a few minutes for the glue to cure, got the next led in, glued it also in place. Glued the cut open backside also together.
Victory !
Motivated by the relatively easy installation I started with the second troll head. The frustration of the evening before quickly came back however :-(
Tried to put in one led. It broke. Bending thin metal legs of leds in a 90 degrees angle is not a good idea :(
Soldered a new led on (luckily I have enough leds laying around).
Tested it, it didn't work. Either it was already broken (or broke because of the heat from soldering), or I accidentaly reversed it.
Unsoldered it, put in a new led. (each time soldering a new piece of wire to one of the legs too). Put it in the troll head.. and one leg broke again.
Soldered a new led on. Tested it. Put it in. Success. Glued in place. Let it dry.
Tried to get the second led in place. It broke. AAAAAAAAAAAAAAAAAAAAAAAAAAAAAAArgh !
Pushed hard to get the glued led back out of the head. Soldered a new led and wire to the first. Tested it. Decided to cut the backside of the head open even more.
Finally I was able to put both leds in place and glue everything.
Called it a night.
Tonight I'll continue assembly. Have to solder a resistor and diode and connecting it all to the coil; Shouldn't be too hard to do. Let's hope I don't encounter any surprises.
Anyway, for those interested in this modification: if you don't have many patience or fine motoric skills: just buy the assembled kit !
Sure the parts themselves are cheap if you want to make it yourself, but don't forget to add the price for two hours of your life fiddling in frustration !
And to those persons that like to sell mods like, adding leds into the Medieval Madness dragon, or into the eyes of the martians on Attack from Mars: respect !
You won't see me doing this type of mod, unless when I can just cut something open from behind :-)
Edit: finally finished ! it works great :)
Monday, May 9, 2011
How the switch matrix works
First in a series of tech articles: how the switch matrix works on pinball machines and why those little diodes on switches are imporant.
Thursday, May 5, 2011
TAF repair
Recently repaired a TAF. I actually even had to return as my first repair didn't solve the problem completely. :-(
Issue reported was that sometimes the game gave errors about the bookcase, .. Weird thing is that it didn't happen all the time, only when the game had been played for a while.
Well the problem didn't show up when I was there :( the machine played flawless.
Inspected the boards, another tech had already replaced the connector on the right hand side of the powerboard (J102 if my memory is correct). Maybe to try to resolve the same problem, maybe the game had reset problems in the past. I don't know.
Judging from the condition of the boards, several repairs had already been done to this game.
Measured voltages on the board, everything was ok. Testpoints ok, all leds were on, .. Anyway my guess was that the bookcase error messages were related to the 12v power used for the optos, and for some reason 12v sometimes dropped. Could be on the board or in the wiring.
While checking voltages on the pins going to the playfield, I noticed the connectors at the bottom left of the powerboard were not tight anymore.
There you have J116, J117 and J118. These all provide ground, +5V and +12V to various boards in the game.
One connector especially was very loose. Probably the game had issues with them in the past and that connector must have been unplugged a lot. The metal clips just had lost all their tension and it felt like they did not make a good connection to the header pins.
Checked a few other connectors on the board and they all were in better condition, but not exceptionally good.
Replaced one connector that provided power to the playfield, that's where the optos get their 12v from. Tested the game, still everything worked.. as it was already getting late, and I couldn't reproduce the error, I called it a day.
Instructed the owner of the game that if the issue came back he had to open the backbox and see if all leds were still on (to see if 12v was missing or not on the pcb) and possibly switch J116, J117 and J118 around and see if that solved the problem (the three are interchangeable).
If the problem would come back I could check the rest of the connectors or check out the header pins too. They weren't burnt so I didn't replace them now (usually only GI pins need replacing, not 5v or 12v pins), and I didn't want to remove the powerboard when it was not required as it would further limit the life of the connectors.
A few days later I got an email from the owner, suddenly the dmd display would show garbage.. instructed the owner to reset the grey flatcable. This solved the problem.
A while later I was contacted again. No opto or display problems this time but sometimes the game would just act weird and play completely wrong sounds.
There could be two sources of this problem - either the grey flatcable that connects the cpu to the sound board (the same flatcable also connects the cpu with the fliptronics and dmd driver board). Through the grey flatcable the cpu instructs the soundboard to play specific sound samples. If the data lines have a problem (ie one is blocked) it's possible the game plays the wrong sounds. It was suspect because the garbage on the dmd.
It could also be a problem with the +12 and +5v connectors as some of the boards in the backbox also get their power from these pins, and these definitely were suspect.
Again the problem didn't show itself when I arrived. Swapped connectors on J116, J117 and J118 around and suddenly it did show up. The wrong sample was played, when you would go into the menu you didn't get the typical 'bong' sound but another music. In the selftest the soundboard would play incorrect samples.
With these symptoms you would suspect a grey flatcable, but I got them while playing with the power connectors ? Weird.
Anyway, as these connectors were already suspect I was going to do the repair good.
Didn't have a replacement flatcable with me (later that evening I told the owner where he could order one if the problem would come back). I would start on the powerboard as that was suspect too. Replaced the two other connectors. Removed the powerboard out of the game to replace all the header pins for these three connectors.
With the board out of the game I inspected the backside and I made an interesting discovery. All pins of all connectors had been reflowed ! And I mean ALL of them, even the thin pins for the small flatcable. I have no idea what repair person did this or how long ago it was. It could've been done by the person that replaced the J102 connector, it may have been someone else. I got the impression this Addams Family pinball machine already had a troublesome history.
Finding this made me more suspect about the powerboard and previous repairs. I live by the 'don't fix it if it ain't broken' rule.
Reflowing all pins just shows that someone tried to shotgun a problem, without trying to understand the logic behind it. Else only specific pins related to the issue would've been reflowed. If the game would reset, you only replace or reflow the parts involved. Sound issue ? Same thing. Reflowing everything ? Either the repair person wasn't very skilled, or the issues he was trying to resolve were random and he couldn't reproduce them at all.
It's possible more problems had been introduced by reflowing everything.
I desoldered and removed the header pins for J116, J117 and J118. Installed new pins. Noticed that there was one specific issue with them, one set has one pin connected on the front of the board, while all other traces run along the backside of the board (I believe 5v on J116 to J117, but going from memory here, don't have schematics with me now). Noticed that I had to use enough solder there. When finished I measured continuity between the back of the board and each pin at the front.
On the powerboard there are some pins that have traces on both sides of the board, you have to doublecheck there that you have continuity.
Also measured continuity between the two connectors that are underneath eachother (J117 and J118). But didn't check the trace on the front between J116 and J117.. (only on the backside if the trace had continuity with the pin).
Installed everything again.. now things suddenly got interesting ? :(
The dmd suddenly didn't work at all ? Oops..
Hope I didn't blow up something by accident. No.. just a voltage was missing. (don't remember if it's the 5 or 12v).
Anyway I remembered this one trace on the front. Measured continuity and indeed - it seems one of both pins was not making contact with this trace. Power arrived from the back of the board to one pin, but didn't continue on this pin through the front of the board onto the other two connectors.
Took the powerboard out of the game again, soldered the pins at the frontside of the board to the pcb, measured everything..
Put the board back into the game. Now everything worked correct !
Dmd worked fine, the correct sounds played..
Problem solved and it hasn't come back..
My guess as what the original problem with this board was (before I replaced pins) is that it also had an intermittent contact on one of these connectors. Probably even with the same trace on the front side of the board, as all pins had been reflowed on the backside and that looked good. When the game was off (board was cold) all pins had continuity, but as the machine was played for a while the board and connectors heated up a bit, a pin or the board expanded a bit and broke continuity.
Things I've learned from this repair:
- having a problem with only 5v or 12v on J116/J117/J118 can still make the soundboard work but play incorrect sounds ?!
- always double check and measure continuity in all directions when you've soldered pins.. especially with traces that continue on the front of the pcb!
Thursday, April 28, 2011
new articles online
Here's an overview of articles I put online the past weeks:
Use an ultrasonic cleaner to clean plastic and metal parts. I bought an ultrasonic cleaner a while ago. Now finally used it to shop a pinball machine and I'm amazed how clean parts come out! This is by far the best tool to buy (it's more useful than a tumbler) when you're cleaning pinball parts. Almost every part comes out sparkling, shining and looking brand new!
Golden Years show in Wieze
It had been a few years since we had visited this show. As it's in 2011 the only show in Belgium we visited again.
Add a real knocker coil to Cactus Canyon. To save costs, CC doesn't have a real knocker installed but the knocker sound is played through the speakers. It's easy to wire up a real coil.
Update to the hidden artwork on playfields.
What to do when you get the Factory Settings Restored error message on your pinball machine.
Repair damage caused by leaked batteries.
How to level a pinball machine and adjust the playfield angle.
More information and history of the Capcom Big Bang Bar pinball machine and its reproduction.
pinrepair has been replaced by pinwiki.com
Most people will probably have already heard it, if not they've probably noticed it by now: most of the game-specific repair guides that were at www.pinrepair.com are gone.
A new site has been launched to replace its role: www.pinwiki.com
Feel free to contribute to articles if you have specific information to contribute..
I intend to finish some technical/basics articles that I started a while ago for my site. Up to now I focused on the basic things and never wrote anything more technical/documenting specific repairs and troubleshooting, as everything you had to know was available on pinrepair. That will change now.
I'll also document more repairs I do to my own games - sort of like the pinballninja blog was, as that blog is also gone.
Just don't expect me to document 500 repairs a year.. :-)
Readers of this blog that do interesting repairs may also submit them to me so I can add them..
Wednesday, April 27, 2011
Tron is confirmed as next Stern
It seems Tron is confirmed as the next Stern pinball machine, from what a Canadian distributor has posted. It should go for sale in May.
Our TRON pinball puts the players in the middle of TRON movie and
video game action battles. This is a fast moving game. TRON has 3
flippers, including an upper flipper to shot one of the two fabulous
fast action ramps. We have not utilized a 3rd flipper in a while, and
players will enjoy it. In the center of the playfield, near the top,
there is a motorized 3 bank target assembly the player must hit and
lower, to gain access to the illuminated, motorized spinning disc,
representing TRON's Identity Disc. The spinning disc shoots the ball
randomly across and around the playfield. Ramp shots take the player
to an exciting Light Cycle multiball. The player shoots at the
miniature TRON video game to start exciting features and collect big
points.
Monday, April 25, 2011
stuck pinball

Got a friend over last week, he was playing on Cactus Canyon.
Suddenly the pinball got stuck, in quite an original place.
The pinball bounced off the Bart hat and got stuck behind the flasher on top of the lost mine. We had to remove the glass to remove it.
Luckily the lost mine plastic wasn't installed because it may not have survived this..
Yesterday I had a similar experience. My new boulder plastic was installed. The pinball rolled over one of the droptargets, just as it went up. The pinball was catapulted into the air and slammed hard into the mountain plastic. Luckily it survived well :-)
Thursday, April 21, 2011
Funhouse repair
Fixed my Funhouse a few weeks ago already, only now have time to move pictures from the camera I keep in the gameroom and blog about this repair.
When I bought this Funhouse pinball machine it didn't work completely, Rudys mouth didn't stay open.
The mouth would open and close correctly during gameplay, as Rudy speaks to you when playing a game. But when you're in multiball then the mouth would not stay open. You couldn't lock your 3rd ball to start multiball. And there's no fun in the Funhouse if you can't start multiball !
I noticed a few teeth of the gear were stripped. When I bought the machine I thought this was the cause of the problem - the stripped teeth made the mouth close again. Replaced it with a new gear I had around.
To my amazement this did not solve the problem. When you lock 3 pinballs, Rudys mouth still closes again.
Did the selftests but didn't immediately notice anything wrong. During selftest the mouth opens and closes correct ?
Started to think about it (and thanks to a reply on RGP) it finally hit me - there's also a small pcb underneath the playfield which is involved in controlling the motor and its direction. That had to be the culprit.
Took out the pcb, measured every component, transistor, and all looked ok.
There was however a jumper wire connected on the input pins which shouldn't be there.
2 pins were jumpered together ? According to the schematics these were individual input pins.
Removed this extra wire. This was probably the source of my problem and why the gear had stripped - because of it the motor always ran in one direction ?
Put the pcb back in, suddenly it didn't work at all anymore. The mouth stayed closed.
What could it be ? I knew it was working before so the pcb should be ok.
Looked again at the pcb. Tested parts.. spent too much time measuring every transistor and resistor on it again. Looking to the solder side of the pcb it was obvious repairs had been done to it and a few components had been changed - but as far as I could measure these were now working well.
Checked the schematics, thought about this extra wire.. suddenly I noticed on the connector that went to the pcb, there was a wire missing !
You can see it in the below picture: at the very left side, one blue wire is bent backwards and it's end is nicely tucked away with some electric tape:

I attached the wire again to the connector and now Rudy works completely like he has to !
In the photo it's easy to spot, but that's because the pcb is hanging loose.
Normally it's attached in the very back at the bottom of the playfield. Because the playfield only rotates up (and doesn't slide forward like on more recent WPC machines) you really have to bend inside the cabinet to see it, and this wires are half hidden by other wires and parts at the bottom of the playfield..
The weird thing is I don't understand the history of this repair.
I can only think that several repair persons worked on this, one more skilled than the other.
Maybe first the transistor or something else failed on the pcb which made the mouth run all the time or only in 1 direction.
To solve this (maybe a quick fix on location ?) the blue wire controlling this was removed from the connector.
Later another tech who's more skilled worked on this game ? (or the same one, but he had forgotten what he had done before ?) He takes out the pcb, repairs the broken components, installs it and it doesn't work. He misses the removed wire because it's well hidden underneath the playfield, but does notice he needs some input to the board on that pin. So he attaches a jumper wire from one pin to the other.
Does selftests, mouth opens and closes correctly, problem solved.
(Except for when you want to start multiball, the mouth doesn't stay open, which is something you don't immediately notice)
The weird thing is the person I bought this game from had it over a year. As far as I know no tech worked on it in his house. This means all this time he never had a completely working game and could never start multiball ?? Unless by accident - if are lucky you can shoot a ball in Rudys mouth just when he is talking.
Never had such a weird fix. The board was already repaired, just 1 wire needed to be connected again. Easy for me (although I wasted too much time until I noticed it).
but at least I can enjoy Funhouse like it is meant !
(fixing the plungers for the eyes is something I'll to later when I have time to shop the game completely).
When I bought this Funhouse pinball machine it didn't work completely, Rudys mouth didn't stay open.
The mouth would open and close correctly during gameplay, as Rudy speaks to you when playing a game. But when you're in multiball then the mouth would not stay open. You couldn't lock your 3rd ball to start multiball. And there's no fun in the Funhouse if you can't start multiball !
I noticed a few teeth of the gear were stripped. When I bought the machine I thought this was the cause of the problem - the stripped teeth made the mouth close again. Replaced it with a new gear I had around.
To my amazement this did not solve the problem. When you lock 3 pinballs, Rudys mouth still closes again.
Did the selftests but didn't immediately notice anything wrong. During selftest the mouth opens and closes correct ?
Started to think about it (and thanks to a reply on RGP) it finally hit me - there's also a small pcb underneath the playfield which is involved in controlling the motor and its direction. That had to be the culprit.
Took out the pcb, measured every component, transistor, and all looked ok.
There was however a jumper wire connected on the input pins which shouldn't be there.
2 pins were jumpered together ? According to the schematics these were individual input pins.
Removed this extra wire. This was probably the source of my problem and why the gear had stripped - because of it the motor always ran in one direction ?
Put the pcb back in, suddenly it didn't work at all anymore. The mouth stayed closed.
What could it be ? I knew it was working before so the pcb should be ok.
Looked again at the pcb. Tested parts.. spent too much time measuring every transistor and resistor on it again. Looking to the solder side of the pcb it was obvious repairs had been done to it and a few components had been changed - but as far as I could measure these were now working well.
Checked the schematics, thought about this extra wire.. suddenly I noticed on the connector that went to the pcb, there was a wire missing !
You can see it in the below picture: at the very left side, one blue wire is bent backwards and it's end is nicely tucked away with some electric tape:
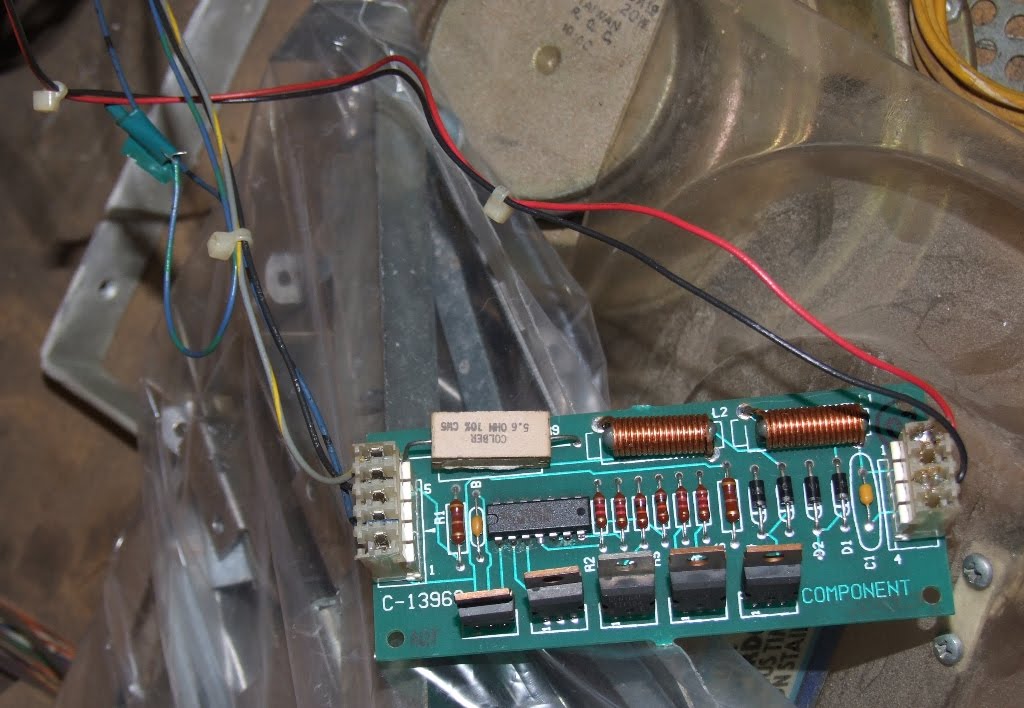
I attached the wire again to the connector and now Rudy works completely like he has to !
In the photo it's easy to spot, but that's because the pcb is hanging loose.
Normally it's attached in the very back at the bottom of the playfield. Because the playfield only rotates up (and doesn't slide forward like on more recent WPC machines) you really have to bend inside the cabinet to see it, and this wires are half hidden by other wires and parts at the bottom of the playfield..
The weird thing is I don't understand the history of this repair.
I can only think that several repair persons worked on this, one more skilled than the other.
Maybe first the transistor or something else failed on the pcb which made the mouth run all the time or only in 1 direction.
To solve this (maybe a quick fix on location ?) the blue wire controlling this was removed from the connector.
Later another tech who's more skilled worked on this game ? (or the same one, but he had forgotten what he had done before ?) He takes out the pcb, repairs the broken components, installs it and it doesn't work. He misses the removed wire because it's well hidden underneath the playfield, but does notice he needs some input to the board on that pin. So he attaches a jumper wire from one pin to the other.
Does selftests, mouth opens and closes correctly, problem solved.
(Except for when you want to start multiball, the mouth doesn't stay open, which is something you don't immediately notice)
The weird thing is the person I bought this game from had it over a year. As far as I know no tech worked on it in his house. This means all this time he never had a completely working game and could never start multiball ?? Unless by accident - if are lucky you can shoot a ball in Rudys mouth just when he is talking.
Never had such a weird fix. The board was already repaired, just 1 wire needed to be connected again. Easy for me (although I wasted too much time until I noticed it).
but at least I can enjoy Funhouse like it is meant !
(fixing the plungers for the eyes is something I'll to later when I have time to shop the game completely).
Wednesday, April 20, 2011
41 million points on Funhouse
Finally started to playi Funhouse more often. I bought it a few months ago, fixed it a while ago, but it only got a few occasional plays. Not that I don't like it, I really love it, but I'm now fixing games inside the gameroom (a Medieval Madness now came in to restore) and working on some projects, so my time is spent on those and not on long sessions playing pinball.
2 days ago my daughter wanted to play Funhouse but I had to teach her how to start multiball (she really likes to start multiball on any pinball machine, and already knows she can get a lot of points for it).
So with her sitting on a high chair in front of the game and I standing behind her (looking over her shoulder because else I couldn't see the flippers) I played a game.. and improved my highscore from 15million to 17 million. Not bad :)
The game didn't last very long, only started multiball once but was able to shoot a lot of jackpots.
Yesterday afternoon I was baking a cake, it was in the oven and I thought I have about 10 minutes left, time for a quick game of pinball.
Started to play FH and had the best game I ever had on any Funhouse pinball machine.
Was able to start multiball 3 times. When I had locked 2 balls for the 3rd time I remembered about the cake so I quickly ran inside the house to turn off the oven.. and then get back to shoot the ball into Rudys mouth :)
Final score, a bit over 41 million. Nice.
I really love the music when you've gotten a highscore and can enter your initials..
Sunday, April 17, 2011
Always Coca-cola
This is one for the most original pinball repairs list.
Repaired a Dirty Harry in the rec room of a restaurant.
Didn't have many details, also was told that the ball sometimes got stuck.
Play-tested a bit and indeed sometimes it got stuck between two ramps.
Didn't see something obvious wrong with the ramps, they were still screwed in place, nothing loose.. so I was looking for something to fix the ball hanging.
Needed something to put in between them and add some spacing.. looked around, didn't find anything useful, except for one empty Coca Cola bottle.
Took the cap, cut it in half, and stuck it tight between the ramps.
You can see it in the picture - left of the house there's a metal post supporting the top ramp. The red cap is next to it, pushing the bottom ramp a bit down.
Now the pinball doesn't get stuck anymore. After taking this picture I put some grey tape over it to cover and keep it in place.

Wednesday, April 6, 2011
Cactus Canyon repro guns and mountain
Something else I'm working on since a few weeks: learning to make my own molds in silicone and make reproductions from objects.
More specific, I'm trying to repro the Cactus Canyon mine mountain plastic and the gun handles.
A full article will appear on my site in the future when I'm finished and learned enough.
Cactus Canyon mountain plastics were unobtainable for the last years. Suddenly a few have appeared on ebay but they are much too expensive for me.
My mountain isn't really bad but not mint either.
Many years ago I looked a bit into casting parts in resin (Leon of pinballleon.com then also did and he sells Scared Stiff boney flippers he casts himself).
Since then I never needed anything.. until now.
Now buying a NOS cactus canyon mountain plastic is no option for me, it was time to pick up this project and try to make one myself to improve my pinball machine.
And I've seen pictures of someone who has customised his Cactus Canyon pinball machine by painting the gun handles and it looked great !
But I prefer to have original parts on my machine - therefor I also started to make a mold for the gun handles. It was easy to do as they're small and flat.
Now I can keep my original parts - in case I ever decide to sell my game and the buyer prefers to have everything original. But I can make replacement parts to paint and customize it like I want, and not be afraid of messing up a part that's not replaceable.
2 weeks ago I made a mold for the gun handles. Poured epoxy in it, worked fine.
First test was a success, I learned to make a mold and cast resin.
The mold for the gun handles is good. Details are nice and sharp. Compared side by side with an original you may see some very small differences, but installed in the machine you wouldn't know it was a reproduction piece.
Last week then I made a big mold for the lost mine mountain plastic.
Gave it enough time to cure, and this week I tried to cast my first plastics.
First didn't work well, I had used too much material. It was too thick and heavy.
The mountain is hollow, so unlike the gun handles, you can't just fill it completely with resin. Making a cast of this requires a special technique.
It was a good test for my mold to see if the shape was correct. Only where I had closed the hole it's not perfectly smooth.
In the picture below you see my next trials. Middle right is my original lost mine plastic. At top left is my second attempt. The shape is fine, but it's a little bit too thin. I used about 60 gram of epoxy in that one. It also shows the natural color of the poly-urethane resin. I get better practice getting an even layer of resin all around, to cast a hollow object.
Top right is my third try of casting a cactus canyon mountain plastic.
I added brown pigment to it, trying to simulate the original color. Looks like I've added too much, the color is too dark. Also used a bit too much epoxy, about 80 grams in total. The mountain plastic is strong but the edges were difficult to cut. So next time I'll try 65 to 70 gram of epoxy and less brown pigment..
I'd like to get the resin in the correct color so I only have to paint additional color to have it match the original color scheme. If I don't succeed in matching the color I'll just take that unpainted one and give it two layers of paint so it matches. But too many layers of paint may block the light from the flasher lamp that's underneath in the game..

On the bottom in the picture are the gun handles. Bottom right is an original one.
The other three I've casted.
One painted completely silver, and the other two I haven't painted the lizard yet. Will paint this green (or maybe another color, I'm not sure yet).
I haven't made a mold yet for the rest of the gun, I'm considering doing this also.
Original they're black, but I think they'll look much better in chrome/silver, like real guns do. But as they're two large plastics, a lot of silicone will go into them.
Don't know yet if I want to spend that much on material just to cast one pair of guns for myself..
Update: article is ready about casting your own 3D pieces using a silicone mold.
More specific, I'm trying to repro the Cactus Canyon mine mountain plastic and the gun handles.
A full article will appear on my site in the future when I'm finished and learned enough.
Cactus Canyon mountain plastics were unobtainable for the last years. Suddenly a few have appeared on ebay but they are much too expensive for me.
My mountain isn't really bad but not mint either.
Many years ago I looked a bit into casting parts in resin (Leon of pinballleon.com then also did and he sells Scared Stiff boney flippers he casts himself).
Since then I never needed anything.. until now.
Now buying a NOS cactus canyon mountain plastic is no option for me, it was time to pick up this project and try to make one myself to improve my pinball machine.
And I've seen pictures of someone who has customised his Cactus Canyon pinball machine by painting the gun handles and it looked great !
But I prefer to have original parts on my machine - therefor I also started to make a mold for the gun handles. It was easy to do as they're small and flat.
Now I can keep my original parts - in case I ever decide to sell my game and the buyer prefers to have everything original. But I can make replacement parts to paint and customize it like I want, and not be afraid of messing up a part that's not replaceable.
2 weeks ago I made a mold for the gun handles. Poured epoxy in it, worked fine.
First test was a success, I learned to make a mold and cast resin.
The mold for the gun handles is good. Details are nice and sharp. Compared side by side with an original you may see some very small differences, but installed in the machine you wouldn't know it was a reproduction piece.
Last week then I made a big mold for the lost mine mountain plastic.
Gave it enough time to cure, and this week I tried to cast my first plastics.
First didn't work well, I had used too much material. It was too thick and heavy.
The mountain is hollow, so unlike the gun handles, you can't just fill it completely with resin. Making a cast of this requires a special technique.
It was a good test for my mold to see if the shape was correct. Only where I had closed the hole it's not perfectly smooth.
In the picture below you see my next trials. Middle right is my original lost mine plastic. At top left is my second attempt. The shape is fine, but it's a little bit too thin. I used about 60 gram of epoxy in that one. It also shows the natural color of the poly-urethane resin. I get better practice getting an even layer of resin all around, to cast a hollow object.
Top right is my third try of casting a cactus canyon mountain plastic.
I added brown pigment to it, trying to simulate the original color. Looks like I've added too much, the color is too dark. Also used a bit too much epoxy, about 80 grams in total. The mountain plastic is strong but the edges were difficult to cut. So next time I'll try 65 to 70 gram of epoxy and less brown pigment..
I'd like to get the resin in the correct color so I only have to paint additional color to have it match the original color scheme. If I don't succeed in matching the color I'll just take that unpainted one and give it two layers of paint so it matches. But too many layers of paint may block the light from the flasher lamp that's underneath in the game..
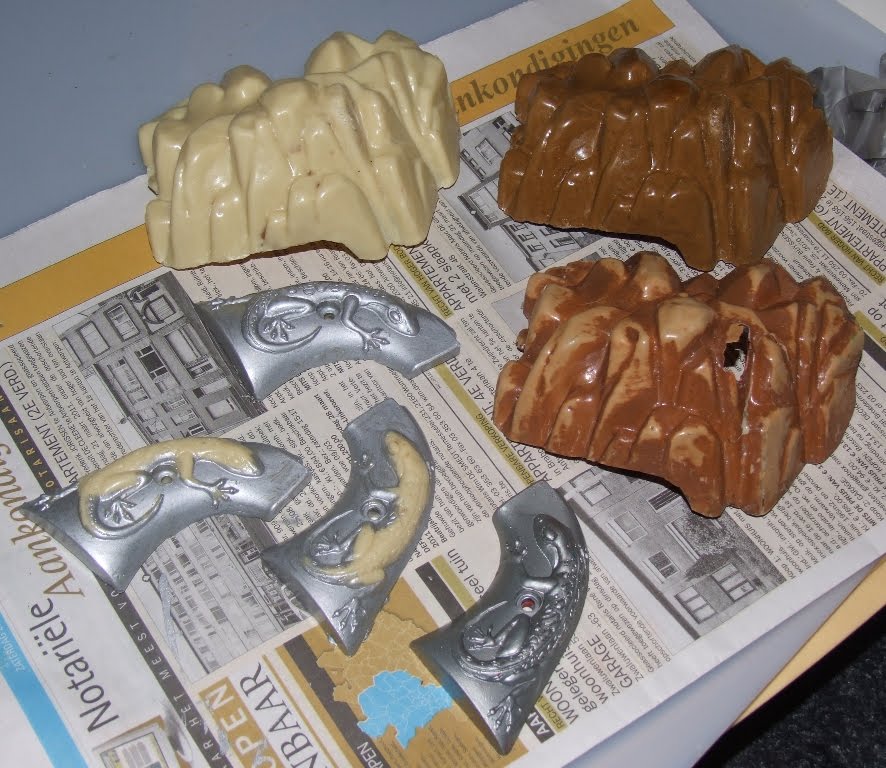
On the bottom in the picture are the gun handles. Bottom right is an original one.
The other three I've casted.
One painted completely silver, and the other two I haven't painted the lizard yet. Will paint this green (or maybe another color, I'm not sure yet).
I haven't made a mold yet for the rest of the gun, I'm considering doing this also.
Original they're black, but I think they'll look much better in chrome/silver, like real guns do. But as they're two large plastics, a lot of silicone will go into them.
Don't know yet if I want to spend that much on material just to cast one pair of guns for myself..
Update: article is ready about casting your own 3D pieces using a silicone mold.
Subscribe to:
Posts (Atom)

